Camera Equipment and Settings for Sharp Photos
The key to taking sharp photos might seem like a tightrope walk, but don’t let soap bubbles pop your dreams!
Let’s get you snapping pictures clearer than a bell’s ring on a sunny day.

Choosing the Right Camera and Lens
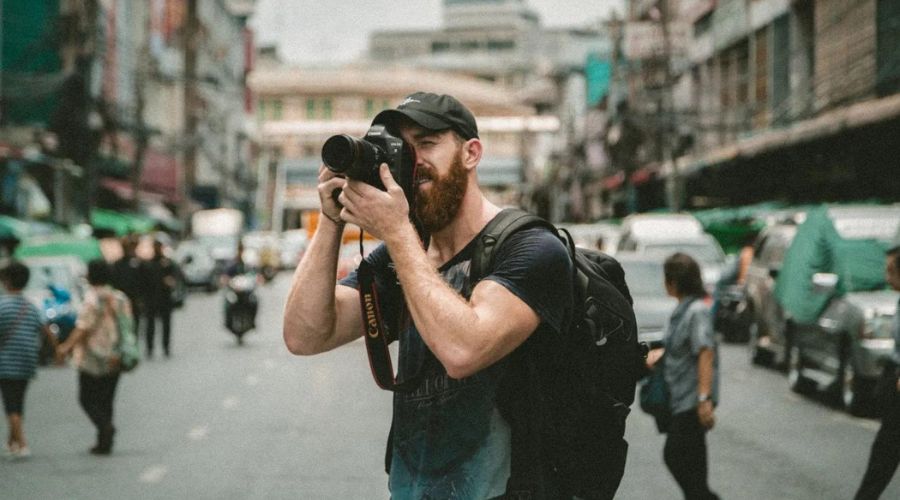
You don’t need a magic wand to take crystal clear pictures, just a good camera and the right lens. Think of your camera as your trusty sidekick—ready to capture life’s moments with a clear eye.
Go for a DSLR or a mirrorless camera if you can, because they’re the hot rods of the photography highway.
Lenses? They’re the secret sauce. A prime lens (which doesn’t zoom) is often sharper than a Swiss Army knife and can make your photos dazzle.
Optimal Camera Settings for Sharpness
Ready for the inside scoop on camera settings? Set that aperture to the sweet spot, usually between f/8 and f/11, where it’s sharper than a tack.
Keep your ISO as low as a snake’s belly—it’ll give you less grain than a silo.
And remember, shutter speed is like salsa dancing—too slow and you’ll blur like a twister, too fast and you won’t capture enough light. Find the rhythm and stay steady!
Using Tripods and Stabilizers to Enhance Sharpness
Let’s not beat around the bush—tripods and stabilizers are the unsung heroes of sharp photos. Think of a tripod like a rock—steadfast and unshakable. It holds your camera stiller than a hibernating bear, nixing blur from shaky hands.
Got no tripod? Lean on a wall or plop onto the ground—it’s the down-to-earth way to stabilize your shot.
Importance of Using the Correct Focal Length
Have you ever noticed that your photos can miraculously change from fuzzy to sharp with a simple twist? That’s the magic of the correct focal length. It’s not rocket science—shorter focal lengths are generally more forgiving than the strict librarian of the longer ones.
And remember, zooming with your feet instead of your lens keeps you moving like Jagger and your photos sharper than a math whiz!
Lock it all in, and you’re good to go. Keep these tips in your back pocket and your snapshots will be so sharp, they might just cut through the haze of an early morning fog.
Now go out there and freeze time with a click, like a superhero with a camera for a cape!
Focusing Techniques for Crisp Images
Getting those tack-sharp photos you admire isn’t as elusive as finding a needle in a haystack. So, let’s dive right into how to take sharp photos with some nifty focusing techniques.

Manual vs. Autofocus: Which to Choose?
You have two choices here: manual or autofocus. Like a maestro conducting an orchestra, manual focus gives you the baton to fine-tune your image.
But it’s a bit like patting your head and rubbing your belly simultaneously—it takes practice. Autofocus, on the flip side, is like having a trusty sidekick; it does the heavy lifting for you.
Most times, it’s spot on, but there are instances where manual focus might just be the ace up your sleeve.
Focus Modes for Different Shooting Scenarios
Picking the right focus mode is like choosing the right tool for a job. You wouldn’t use a sledgehammer to crack a nut, right?
Use single-point focus for static subjects, and continuous focus when your subject is moving faster than kids chasing an ice cream truck.
Then there’s automatic focus point selection, which works a bit like magic, selecting the focus point for you. Neat, huh?
Using Live View for Precise Focusing
Think of your camera’s Live View like a magnifying glass. Use it to get up close and personal with your subject on your camera’s screen before you snap the photo.
It’s a game-changer for nailing focus on those still-life shots or for landscape scenes where you’ve got time to be as picky as a cat in a fish shop.
Back Button Focus for Greater Control
Back button focus is a bit like having a secret handshake. It separates focusing from your shutter button, giving you more control than a circus juggler.
Once you get the hang of it, it’s like riding a bike—you’ll never forget how, and it might just become your favorite trick.
The Role of Hyperfocal Distance in Landscape Photography
For landscape buffs, mastering hyperfocal distance is like hitting a photography home run.
It’s that point of focus where everything from half that distance to infinity is as sharp as a tack. It takes some math, but once you’ve got it, you’re golden.
Everything in your scene will pop with clarity, from the flowers in the foreground to the mountains yonder.
Shutter Speed and Its Effect on Sharpness
Snapping a sharp photo is a bit like catching a fly with chopsticks; your shutter speed needs to be quick.
If your shutter speed is too slow, your photos might come out like a blurry mess, as if you’d sneezed at the exact moment you pressed the button.
As a rule of thumb, keep your shutter speed faster than the reciprocal of your focal length to avoid camera shake.
Aperture Considerations for Depth of Field
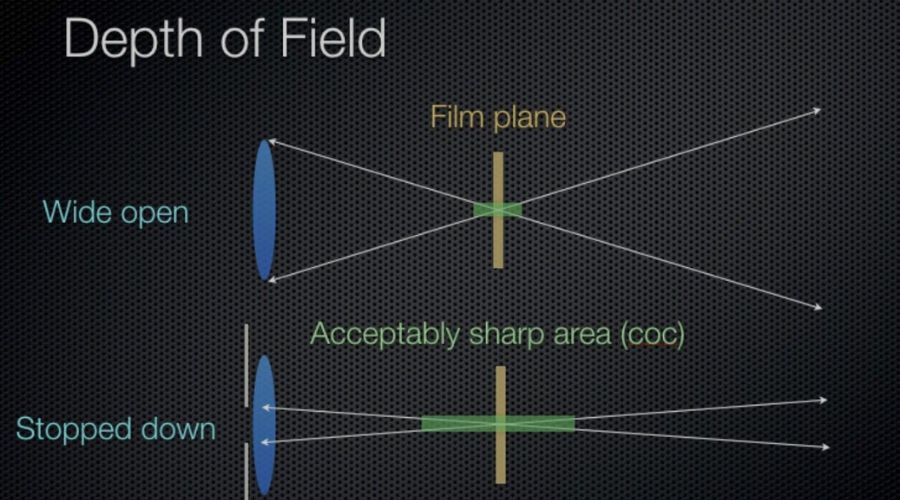
Fiddle with your aperture like you’re tuning a guitar. A smaller aperture (a higher f-number) gives your photos a wider depth of field, making more of your shot in focus.
But beware the Goldilocks zone; don’t close down too much or you’ll hit the diffraction limit where sharpness drops off like a cliff. Keep it just right!
ISO Settings and Image Quality
Bumping up your ISO is like adding more sugar to your coffee—it makes things brighter, but too much and it gets bitter.
Cranking up the ISO can save a photo in low light, but it also brings the noisy party guests: grain and loss of detail. Keep that ISO as low as the tempo in a smooth jazz song to maintain the quality.
So, now you’re equipped with the knowledge to make your photos pop with sharpness. Remember, it’s a dance between shutter speed, aperture, and ISO, with your focusing technique leading the way.
Lighting and Composition for Sharper Photos
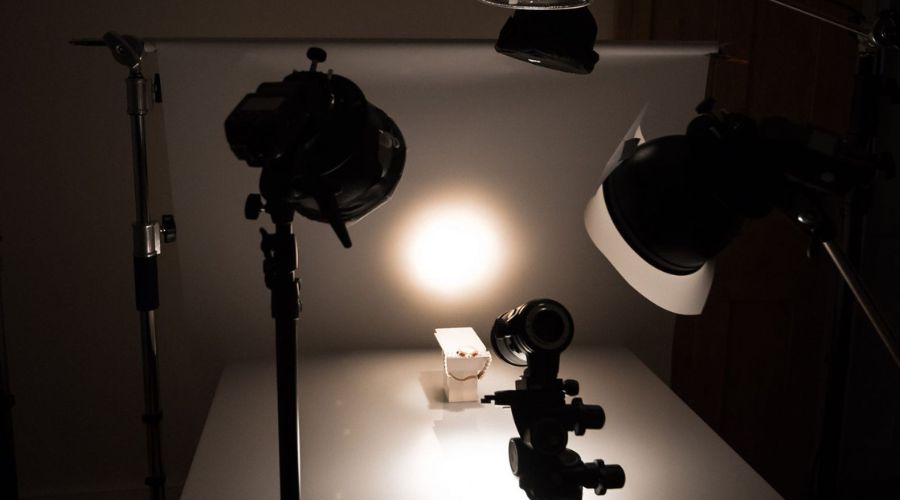
Let’s face it: good lighting is the secret sauce of photography. But don’t worry, you don’t need fancy gear to make your photos pop. Sometimes, Mother Nature is the best photo assistant you could ask for.

Utilizing Natural Light for the Best Results
When the sun is playing nice, take advantage. It provides the kind of glow that can make your images as sharp as a samurai sword—okay, almost. Shoot during the golden hours, just after sunrise or before sunset, and watch as the magic unfolds in your photos.
Impact of Directional Light on Image Sharpness
Think of light as a helpful arrow pointing to the ‘wow’ in your photo. Angling things just right can make your picture sharper than a porcupine at a balloon party. Side-lighting emphasizes texture, while backlighting can outline your subject with a sharp halo of light.
Compositional Techniques to Enhance Perceived Sharpness
Got a busy background turning your photo into a hide-and-seek champion? Simplify. By removing the clutter, your main subject will stand out—sharp, clear, and saying, “Here I am!” Like putting the cherry right on top of the sundae, it draws the eye where you want it.
Negative Effects of Diffraction and How to Avoid It
Here’s a little-known fact: crank your aperture to its smallest setting, like f/22, and you might as well be shooting through grandma’s old lace curtains. That’s diffraction stealing your sharpness. Stick to the sweet spot, usually around f/8, and your photos will be sharper than a knife on Thanksgiving.
Remember, achieving tack-sharp photos is all about mastering the light, simplifying your composition, and knowing your gear. With these tips, you’ll be catching those sharp-as-a-whip images in no time.
Advanced Tips and Tricks for Sharp Photography
How to take sharp photos may seem like a piece of cake, but in reality, it’s like trying to thread a needle on a bumpy bus ride.
To help you freeze those oh-so-fleeting moments with crystal clarity, let’s dive into some pro tips that’ll make your snaps as sharp as a tack!
The Benefits of Mirror Lock-Up and Delayed Shutter
First things first – that nifty mirror in your DSLR can be a sneaky culprit of camera shake.
Flapping up and down like a hyperactive butterfly, it can blur your shot. Engage mirror lock-up to make it sit still. Then, you add a delayed shutter action, and voila! It’s like giving your camera a chill pill before it takes the shot.
Just imagine it’s taking a deep breath before nailing a gymnastics routine. Perfect execution, no blur.
Calibrating Your Lens for Ultimate Sharpness
Now let’s chat about your lens. It’s not just a pretty glass eye; it needs some pampering to perform its best. Calibrating your lens is like tuning a guitar before a big solo.
You wouldn’t want fuzzy notes, right?
Same with pictures. A little tweak here and there with lens calibration, and your photos will hit all the right notes of sharpness.
Focus Stacking for Maximum Detail in Macro Photos
For those awe-inspiring macro shots, focus stacking is your secret weapon. It’s not playing Jenga with camera settings, but rather layering multiple images with different focus points.
Think of it like assembling a burger; each layer contributes to that flavorful bite. Mash them together and you get the ultimate combo of sharp details stretching across the whole frame. Yum!
Image Stabilization: When to Use and When to Disable
Last on the docket is Image Stabilization (IS), your camera’s built-in gyroscope. It’s like having sea legs on a wavy sea of shaky hands.
But, here’s the kicker – when you’re anchored down on a tripod, turn off the IS. It’s like telling a kid to sit still when they’re already glued to their cartoons. No need for extra fuss when you’re sturdy as a rock.
Remember, a sprinkle of patience and a dollop of practice will cook up the recipe for picture-perfect sharpness.
Snapping It All Together: Your Sharpest Shots Await
You’ve journeyed through the land of sharp photography, and it’s time to take the wheel.
Remember, taking sharp photos isn’t rocket science, but it’s also not a piece of cake. It takes a dash of know-how, a sprinkle of practice, and a good eye for detail.
Once upon a photo, blurry images were your nemesis, but not anymore! Keep a steady hand, play with your settings, and diffuse the mess out of that light.
Whether you’re capturing the essence of a street fair or freezing the flight of a hummingbird, your skills are now sharper than a tack.
And there you have it! Keep those lenses clean, your focus locked, and your passion for capturing life’s moments burning bright.
Frequently Asked Questions
What’s the trick to snapping sharp photos every time?
Think of your camera like a hungry critter: it needs a steady hand to feed it right. Keep it as still as a statue when you take a shot. A tripod is your best buddy for this. Also, nail the focus by giving your subject the spotlight in your camera’s eye.
How can I stop my pictures from turning out blurry?
Avoid the blur blues by not rushing. Quick clicks can lead to shaky shots. Slow down your roll and take a breath before pressing the button. Up your shutter speed if you’re in action mode—it’s like telling your subject, “Freeze, buddy!”
Any advice for using my camera’s settings to get clearer shots?
Sure thing! Your camera’s like a mini-computer; it’s smart! Use a low ISO number for less grain. Check if your aperture’s not too wide—a smaller hole can sharpen the scene. Flip through your camera’s manual like it’s a comic book; you’ll find golden nuggets of wisdom there.
How do I keep my photos sharp when I’m zooming in?
Zooming’s like using a magnifying glass: it shows everything, warts and all. So, hold your breath like you’re diving underwater and snap that photo with a surgeon’s steady hand. If your lens has it, switch on image stabilization. It’s like magic—poof!—the shakes are gone.
Do lenses really make a difference for sharp photos?
You bet! Lenses are like windows—a cleaner, clearer window makes for a better view. Invest in a decent lens and keep it cleaner than a whistle. Quality glass will do wonders for your photo’s crispness.
Why do some of my photos look sharp on my camera but not on my computer?
Cameras can be sneaky little tricksters. What looks fab on a tiny screen might be a mess on a big one. Think of the computer as the ultimate truth-teller. Use it to check your pics and adjust your camera habits accordingly.
What’s the deal with manual focus? Should I use it?
Auto-focus is like autopilot, but sometimes you gotta grab the wheel. Manual focus gives you the reins. It’s like playing a video game—line up the shot just right, and score! Practice makes perfect, so give it a whirl.
What’s the best way to practice taking sharper photos?
Practice makes perfect! Click away like there’s no tomorrow. Try out all the settings—twist and turn every knob and dial. Shoot lots of pics; mix things up. Make it fun, not homework. The more you play, the sharper your shots will get.

