Understanding the Essentials of Product Photography
Getting your DIY product photography right means nailing the essentials. Think of it like baking a cake—you need the right ingredients before you can decorate and serve it up.
First things first, let’s talk gear. Don’t worry, it’s like a walk in the park; even a beginner can handle it.
Key Equipment for DIY Product Photography
You don’t need high-falutin, fancy-schmancy gear to take great product photos. But you do need some basics.
A decent camera good enough for product photography—or your smartphone, in a pinch—and a tripod are the peanut butter and jelly of photography.
Oh, and make sure you’ve got plenty of space. You don’t want to be stuck in a closet trying to channel your inner Annie Leibovitz.
Understanding Lighting and Its Importance
Imagine trying to cook without being able to see what you’re burning—I mean, cooking. That’s what taking photos without good lighting is like.
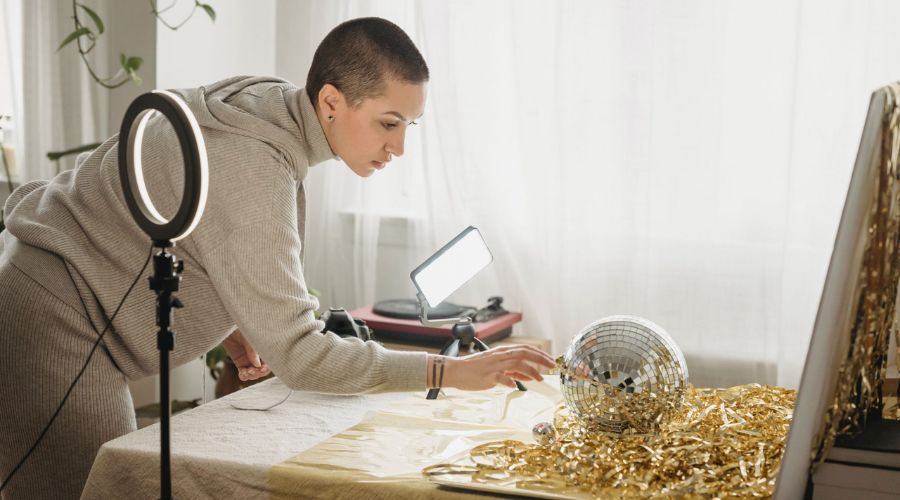
Natural light is the bee’s knees, especially near a window with some sheer curtains to soften it.
If you’re snapping pics when the moon’s out, go for some budget-friendly softbox lights; they’re a game-changer.
The Role of Backgrounds in Product Shots
Backgrounds in photography are like gossip—they can either make or break the story.
Keep it simple.
A plain white backdrop does the trick, letting your product shine like the diamond it is. If you can’t get your hands on one, grab a piece of poster board; it’s as cheap as chips and works just as well.
Remember, the simpler the backdrop, the more your product pops.
And just like that, you’re on your way to snapping product photos that look like a million bucks—without breaking the bank.
Remember to play with angles and lighting, have fun, and say cheese! Well, maybe don’t say cheese unless you’re photographing cheese. Just snap away!
Surf’s up on the wave of DIY product photography tips that’ll get your photos looking sharp as a tack!
First thing’s first: let’s talk about setting up shop where you’ll be snapping those pictures.
Setting Up Your DIY Photography Space
Alright, Picasso, let’s get your studio rolling. The place you pick for your photo shoot spot is key.
It’s like choosing the perfect stage for your one-person show – it’s gotta set the right scene.

Choosing the Right Location
Pick a spot with heaps of natural light – it’s like Mother Nature’s own spotlight!
You want that soft, dreamy light that makes your product pop. But steer clear of direct sunlight – you don’t want harsh lines and shadows stealing the show.
Find a cozy corner by a window, and you’re golden.
When the sun tucks itself in for the night, don’t let your photo shoot fizzle out. It’s time to channel your inner MacGyver and get crafty with DIY solutions.
DIY Solutions for Product Photography Lighting
Who needs pricey gear when you’ve got ingenuity on your side?
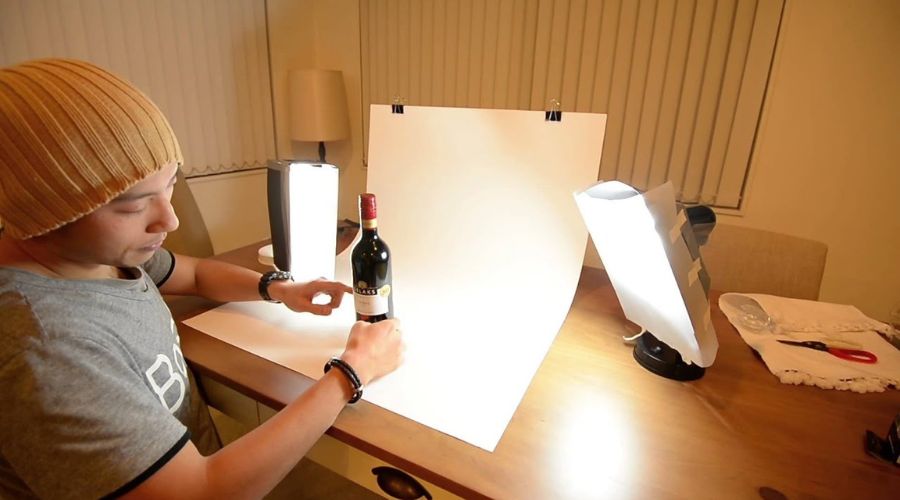
Grab some white poster boards and bounce that lamp light like a pro. It’s like making your own sunshine, and your wallet will thank you.
Whip out some aluminum foil for a makeshift reflector if you’re feeling extra resourceful. Just don’t blind yourself – safety first!
Next up, you’ll need a stage for your star product to strut its stuff.
Creating an Effective Product Staging Area
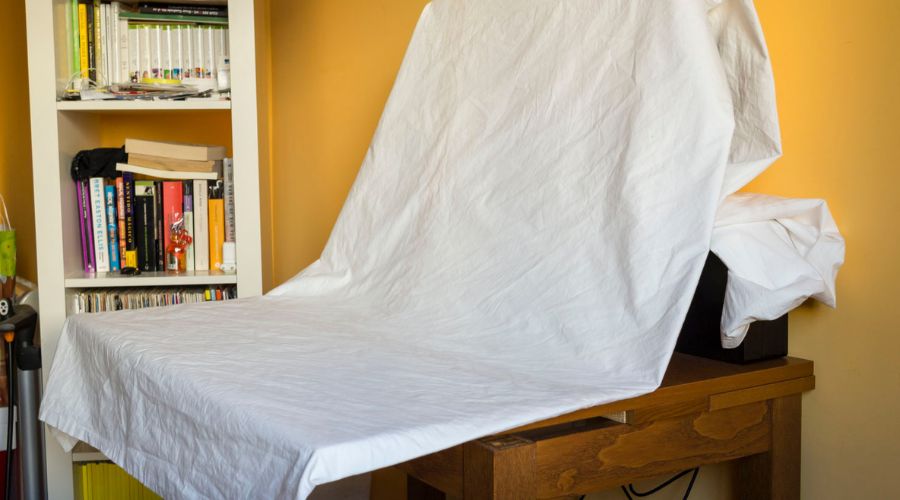
A clean white sheet or a roll of seamless paper makes a backdrop smoother than a jazz tune. It’s simple, it’s sleek, and it lets your product do the talking.
Use books, boxes, or whatever you’ve got lying around to prop up your product. Just make sure it doesn’t wobble – stability is the name of the game.
Keep these tips in your back pocket, and you’ll have a DIY photography space that’s picture-perfect. Now grab that camera, and let’s make some art!
Camera Settings and Techniques
Landing on the perfect camera settings and techniques is like finding a pot of gold for your DIY product photography.
Let’s focus on twiddling those dials and flipping those switches to make your photos pop!

Selecting the Best Camera for Product Photography
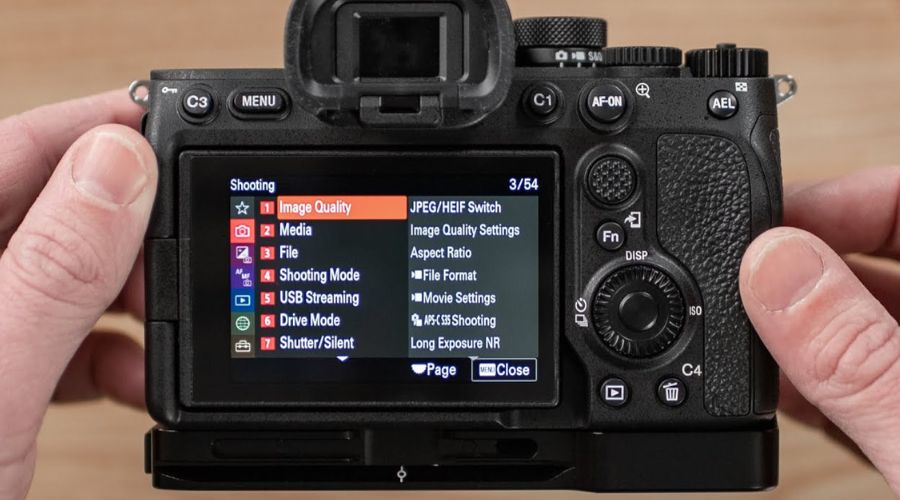
You don’t need a fancy, high-end camera to grab awesome product shots. A reliable DSLR or even a smartphone with a good camera can do the trick.
Just make sure you can tinker with settings like ISO, aperture, and shutter speed. It’s all about the photographer behind the camera—not just the camera itself.
Lens Choices and Their Impact on Your Photos
The right lens can make a good photo great. Generally, a 50mm lens is a solid choice for product photography—it’s like a Swiss Army knife for your camera.
Macro lenses are nifty for close-up detail shots.
Remember, the lens influences the look and feel of your photo, so choose wisely.
Camera Settings for Optimizing Image Quality
To get crisp and clear photos, play around with your camera’s ISO, aperture, and shutter speed. Keep the ISO low to avoid grainy pictures.
Adjust the aperture to control the depth of field; a higher f-number will give you that sharp, everything-in-focus look. And don’t forget a sturdy tripod to prevent any shaky-hand blues.
Composition Tips for Attractive Product Photos
Composition is your magic wand in product photography. Use the rule of thirds to place your product in just the right spot and make it the star of the show.
Get creative with angles and perspectives—it’s a photo shoot, not a mug shot! Keep an eye out for distracting backgrounds, too; you want all eyes on your product.
So there you have it: straightforward tips to take your DIY product photography from meh to marvelous. Keep snapping, keep experimenting, and watch your products shine like diamonds in your photos! 📸✨
So, you’ve decided to take a crack at DIY product photography. Bravo!
Lighting Techniques for DIY Product Photography
Natural Lighting vs. Artificial Lighting: Pros and Cons
Working with Mother Nature is like inviting a fickle celebrity to your photo shoot—you’ve got to catch them on a good day.
Natural lighting can work wonders for your photos, with soft, diffused rays making your products look like they’re ready for their close-up. But beware, clouds can crash your party, and the sun doesn’t stick around for overtime.
Flip the switch to artificial lighting, and you’re in the driver’s seat. You call the shots, and the light stays put.
However, your electric friends can sometimes give off a harsh vibe, especially if they’re not properly diffused. Balance is the name of the game here; mix and match until you strike photographic gold.
How to Create Soft Light with DIY Diffusers
Want to soften those harsh shadows? Make a diffuser your new best friend.
A plain white sheet can work magic, gently scattering the light like pixie dust. Or grab some white tissue paper or a frosted shower curtain—they’re not just for gift wrapping or singing in the shower anymore.
They’re your budget ticket to that dreamy, silky light. Just remember, don’t let these MacGyver moves lead to a fire hazard!
Simple Lighting Setups for Different Product Types
Setting up your shot doesn’t have to be like solving a Rubik’s Cube. Keep it simple.
For shiny objects, think about using indirect light to avoid glare that could blind your camera. Clothing and textiles?
Go for a soft, diffused setup that highlights the textures without harsh shadows. And if you’re capturing something small and detailed, get up close and personal with a simple, focused light source to show off those intricate details.
Remember, the light dance is all about experimenting. Take a step to the left, a step to the right, and snap away until your products look just right.
There you have it—a dash of creativity mixed with practical know-how, and you’re set to turn your shots into showstoppers.
Trust the process, tweak the lights, and soon enough, your photos will be living their best life, ready to woo customers and sprinkle some of that wow factor all over your DIY product photography ventures!
When diving into DIY product photography, nailing that perfect shot starts with the scene behind the goods.
Creating the Perfect Backdrop

Tips for Choosing the Right Background Material
Picking the right background material can be as simple as pie.
Go for solid colors that complement your product but don’t steal the show. White or light grey can be your best pals, making your product pop without any flashiness. Steer clear of shiny materials; glare is a pesky intruder in a good photo.
And hey, who said a crisp piece of paper or a humble fabric can’t do wonders as a backdrop?
DIY Backdrop Ideas and How to Use Them
Who needs pricey props when you can whip up a backdrop faster than pancakes on a griddle?
Pin some wrapping paper on a wall for a spiffy look.
Want a rustic charm? Lay down some wood boards, and bam—you’ve got yourself a winner.
But remember, keep it smooth and wrinkle-free. Nothing mucks up a shot like crumpled lines where they shouldn’t be.
Eliminating Distractions from Product Shots
About as welcome as a bull in a china shop, distractions in product photography are a big no-no.
Clear that clutter, and make your product the lone star on the stage. Keep your eyes peeled for sneaky shadows or reflections that try to crash your product’s party, and give them the boot.
Remember, if it doesn’t serve the shot, it doesn’t belong there—no ifs, ands, or buts.
Finessing your DIY product photography takes a dash of creativity and a pinch of patience, but with these tips under your belt, you’ll be shooting photos that are worth their weight in gold.
Advanced DIY Product Photography Techniques
Spicing up your DIY product photography game can feel like a walk in the park, especially when you know a few tricks of the trade.
Remember, it’s not rocket science, and with these simple yet effective tips, you’ll be shooting photos that pop in no time.
So, strap in and get ready to make your product snapshots sing.
Macro Photography for Detail Shots
Ever hear the phrase “the devil is in the details”? Well, in product photography, that’s where the magic happens, too.
Macro photography is like a magnifying glass for the cool little features of your products. To get those crystal-clear close-ups, use a macro lens or a phone camera’s macro setting.
The key is to have a steady hand or, better yet, a tripod to avoid a case of the blurry photos.
Keep a spritz bottle handy – a mist can make your product look fresh and more engaging to the eye.
Remember, in this game, sharpness is your best friend.
Exploring Different Angles for Dynamic Shots
Don’t be shy about getting a little topsy-turvy with your camera angles.
Think outside the box – shoot from high up, get down low, or go for the quirky tilted angle. Your mission is to create shots that tell a story, and these varying perspectives can add drama and pizzazz.
Play around but watch out for lighting; make sure the shadows aren’t photobombing your perfect shot.
Creating Lifestyle Images with Your Products
You want your customers to picture themselves with your product, right?
That’s where lifestyle images come into play. They’re like a slice of life served up with a side of your product.
Grab some props that gel with your brand and set the scene. Could be a sunhat by your poolside product, or a steaming coffee mug next to that cozy sweater you’re trying to sell. Aim for natural, lived-in shots that scream “this could be you!” without saying a word.
Wrap It Up with a Bow: Rock Your DIY Product Photos!
There you have it! All wrapped up and ready to go, just like a gift. You’ve stepped into the DIY product photography world, and let’s be honest, you’re about to knock the socks off your viewers with your snazzy pics.
Remember, lighting is your best friend—cozy up to it and let it do half the work. With these tips, you’re now armed and ready to make your products shine like a kid’s smile on a sunny day.
Keep it simple, keep it fun!
Fiddling with cameras and angles doesn’t have to be rocket science. It’s more like baking cookies—follow the basic recipe, then throw in your own sprinkle of creativity.
You got this! And hey, if your first shots don’t turn out like those fancy magazine spreads, don’t sweat it. Practice makes perfect. After a while, you’ll be snapping those show-stopping shots as easy as pie.
Now, go ahead and show off your products to the world. You’re not just taking pictures; you’re telling a story. Make it a good one, filled with crystal-clear images that make your viewer’s jaw drop (in the best way possible)!
Frequently Asked Questions
Can I really take high-quality product photos at home?
Absolutely, you betcha! Your home can turn into a mini photography studio with a few tweaks. You just need some good light, a clear backdrop, and your trusty camera, even if it’s just your smartphone. Snapping that eye-catching shot isn’t rocket science; a little practice and you’ll be nailing it in no time.
What’s the best lighting for DIY product photography?
Good lighting is like your best buddy in photography; it can make or break your shot. Natural light works wonders, so set up near a window to let the sunshine in! If the sun’s playing hide and seek, go grab a lamp to brighten things up. Just remember, overhead lights are a no-go – they’re like that friend who always has to one-up you, casting harsh shadows all over your masterpiece.
Do I need a fancy camera to take great product pictures?
Nope, no need to break the bank! Your smartphone has got your back. Today’s phones have cameras that could give pro cameras a run for their money. Just make sure it’s steady – prop it on books, a stack of cans, whatever works. The key is to keep things crisp and clear, and you’re golden!
What background should I use for my product photos?
Keep it simple, Sherlock. A plain background, like a white poster board, is your go-to. It makes your product the star of the show and cuts out the noise. Avoid busy or loud backgrounds; they’re like that one friend who can’t stop talking at a movie – totally distracting.
How do I edit my photos to look professional?
Editing is like giving your photos a little pep talk. Use free apps or software, and stick to the basics: crop, adjust the brightness, pump up the contrast. Don’t go wild, though. You’re not trying to make your product look like it’s headed to a costume party – just a touch-up here and there will do the trick.
Any tricks to make my product photography stand out?
For sure! Your product should pop like popcorn. Play with angles, find the good side – it’s like a selfie for your product. Close-ups are cool, too; they show off the details. Imagine you’re telling a story about your product. Make the viewer feel like they’ve got VIP tickets to the coolest one-person show ever, starring your product.
What common mistakes should I avoid in product photography?
Don’t be a hot mess – steer clear of clutter around your product. Blurry photos? Big no-no, make sure to focus. And lay off the filters, this isn’t a disco from the 70s. Keep colors true to life; your customers will appreciate it. Remember, honesty is the best policy, even in photos.

