What Is a Flash Diffuser?
Imagine you’re at a party snapping pictures left and right.
You want everyone to look like a million bucks, but harsh direct flash can make your friends look like deer caught in headlights. This is where a flash diffuser saunters into the picture.
Definition and Purpose of a Flash Diffuser
A flash diffuser is like your camera’s personal cloud, softening and spreading the light so it flatters your subjects rather than washing them out.
Think of it as the butter on your bread – it spreads the goodness evenly. Its job is to scatter the light from your flash, reducing harshness and shadows, making your photos as smooth as jazz.
Types of Flash Diffusers
Flash diffusers are like ice cream – they come in all sorts of flavors to sweeten the deal.
Bounce Diffusers
First up, bounce diffusers. These bad boys redirect your flash to the ceiling or walls, bouncing it back onto your subject like a soft, glowing hug.
Softbox Diffusers
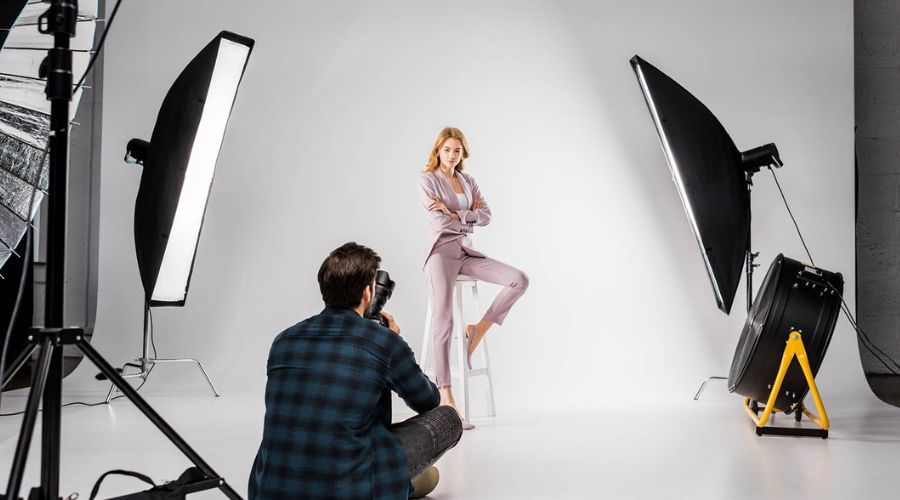
Then you have softbox diffusers, which are like the cozy quilts of the camera world. They wrap your light up in a soft, gentle glow, making sure your subject is looking fresh and crease-free.
Beauty Dish Diffusers
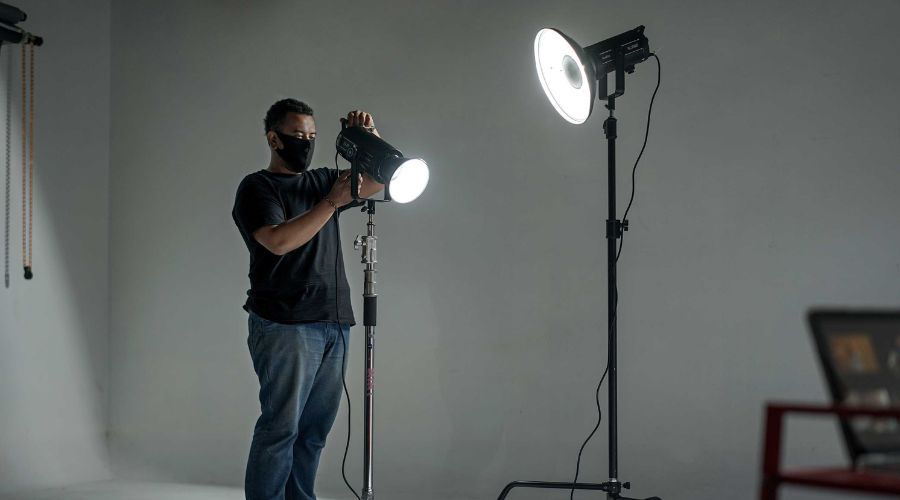
Beauty dish diffusers are the secret sauce that give your models that magazine-worthy shine. They’re like a spotlight that knows how to flatter, spotlighting features with a soft radiance that screams “cover photo ready.”
Advantages of Using a Flash Diffuser
If you’re tired of snap, crackle, pop and want more snap, glamour, wow, a flash diffuser is your golden ticket. It tames the harsh flash, turning your snapshots from glum to glam.
Say goodbye to demonic red eyes and washed out faces; with a diffuser, you’re the wizard of light, conjuring up perfect shots every time.
So remember, without a diffuser, you’re playing darts in the dark. Snap one on and you’re painting with light, capturing shots that will have your friends begging for your secret.
Go on, give your flash that magic touch and watch your photos go from “meh” to “masterpiece.”
When to Use a Flash Diffuser
First things first. Let’s talk turkey about when to whip out this handy tool.

Indoor Photography and Harsh Lighting Conditions
Ever taken a pic indoors and had everyone look like they were caught in a deer-in-headlights moment? Ouch. That’s where your diffuser steps in.
It softens that harsh glare from the flash, giving you photos that are easier on the eyes. No more squinting or shiny foreheads!
Outdoor Photography and the Use of Fill Flash
Bright sunny day? Shooting outdoors can be tricky, but your diffuser can throw a lifeline to those shadows.
It helps fill in the dark spots without overdoing it, keeping nature’s beauty front and center without any harsh contrasts.
It’s like putting sunglasses on your flash—less intense, but still cool.
Portrait Photography and Achieving Soft, Even Light
If you’re keen on making folks look their best with your portrait photography skills, a diffuser is your new BFF. It scatters the light all over the place, which means no more unflattering shadows or highlights.
Your subjects will thank you for that angelic glow. Smile and say, “Cheese!”—because everyone’s going to look fabulous.
Now, are you ready to level up your photo game? Plug that diffuser onto your flash and watch the magic happen.
Remember, it’s all about having a blast while capturing those memories. Keep it light, keep it fun, and keep on clicking!
How to Use a Flash Diffuser

Attaching the Diffuser to Your Flash
First things first: let’s slap that diffuser on your flash. It’s like putting a hat on—it should click right into place.
If it feels like wrestling an alligator, take a breather; it’s supposed to be a snug fit, not a battle. Make sure it’s secure—because a flying diffuser never helped anyone.
Adjusting the Flash Settings for Optimal Results
Nailed the attachment? Sweet. Now, let’s tweak those settings. Don’t let your flash overpower the diffuser’s magic.
Dial down the intensity a bit. It’s like turning down the volume on a rock concert so you can actually hear the lyrics. This way, you get the ambiance without blowing out your highlights.
Positioning the Flash and Diffuser for Different Effects
Playing with flash angle and distance is like finding the perfect spot on your couch—there’s a sweet spot.
Angle it off to the side for a bit of drama, like the mysterious stranger in the corner of a coffee shop.
Or go for the classic look—direct, but softened, like your favorite pair of broken-in jeans. Want shadows as soft as a puppy’s fur?
Move it closer; those shadows will be so gentle you’ll want to pet them.
Mastering the art of using a flash diffuser isn’t rocket science; it’s more like baking cookies. You do have to watch the ingredients and temperatures.
With a little practice, you’ll be serving up photos that are as delightful as those chocolate chip wonders straight out of the oven.
Just remember, every flash and diffuser duo has their own tango. So, keep that dance smooth and your photos will be, too.
Tips for Getting the Best Results with a Flash Diffuser
Once you’ve got a flash diffuser in your photography toolkit, the fun part starts.
Think of your diffuser like a secret sauce; it can turn harsh, flat light into something soft and flavorsome for your photos.
Here are some tips to get those finger-licking good shots.
Experimenting with Diffuser Angles and Positions
Play around with the angles and positions of your diffuser like it’s a game of Twister for your flash. There’s no one-size-fits-all approach here, folks.
Imagine your diffuser is a sunhat for your flash—try tilting it forward, back, and to the sides.
See how the light dances differently with each move, and watch your subject go from ‘meh’ to ‘marvelous’ with just a flick of the wrist.
Lighting’s a playful beast, so don’t be afraid to tickle it until you get the perfect giggle out of it.
Understanding the Impact of Distance and Power Settings
You know how whispers can turn to shouts with just a few steps in an echoey room?
Same goes for your diffuser.
If you cozy it up close to your subject, you’ll get a whisper of soft light. Back it up, and it’s like turning the volume knob up on your favorite jam.
The power settings on your flash? They’re like the spice rack for your photo recipe. Add a pinch or pour it on; just remember the closer you are, the less ‘spice’ you need.
Combining Ambient Light with Diffused Flash
Think of ambient light as the personality of the room you’re in. It’s the natural or existing light that’s just chilling there.
When you throw your diffused flash into the mix, it’s like adding a cool friend to the party—one who gets along with everyone and makes the whole vibe better.
Finding that sweet spot where ambient light and diffused flash do a harmony-rich duet will make your photos sing.
It’s like peanut butter meeting jelly on a perfectly toasted slice of bread. Delish!
Remembering these tips might be as easy as pie or as tricky as teaching grandma to text, but trust me, the end results are worth the playful practice. Just like a good comedy, timing, and delivery make all the difference, so keep snapping and laughing as you go.
Common Mistakes to Avoid when Using a Flash Diffuser
Now, let’s roll up our sleeves and dive into the nitty-gritty of diffuser do’s and don’ts.
Using the Wrong Type of Diffuser for Your Subject or Environment
Picture this: You’re all set to capture that epic shot, but when you press the shutter, the result is as disappointing as a soggy sandwich.
It’s all because you picked the wrong type of diffuser. Not all flash diffusers are created equal. Some diffusers spread light over a larger area for a group photo, while others soften the light for a single subject.
Choose wisely, or you’ll be in for a harsh, well, flash of reality.
Ignoring the Color Temperature of the Flash
Did you know your flash can throw a real curveball in your photos with its color temperature?
It’s like adding too much salt to your grandma’s famous cookie recipe – a small misstep can leave a noticeable taste.
If you fail to match the flash’s color with the surrounding light, you’ll end up with photos that look unbalanced and, frankly, a bit weird. So keep an eye on color temperature; It’s a game-changer.
Forgetting to Adjust the Camera Settings Accordingly
You’ve got your diffuser attached; you’re ready to go. But hold your horses! Did you remember to check your camera settings?
Popping on a diffuser doesn’t give you the green light to ignore your camera’s settings. If you don’t adjust your exposure, ISO, and shutter speed, you might as well be shooting in the dark, literally.
Make sure everything is in harmony, just like a choir singing in perfect pitch.
At the end of the day, a flash diffuser is a tool that’s meant to give you soft, dreamy lighting, not to be the bane of your photography existence.
Flash Diffuser Alternatives and DIY Solutions
Okay, so you’re elbow-deep in the photography game and you realize your flash is about as subtle as a bull in a china shop.
What’s next?
You guessed it!
Time to talk about softening that glare with some crafty solutions.

Homemade Diffusers and their Effective Use
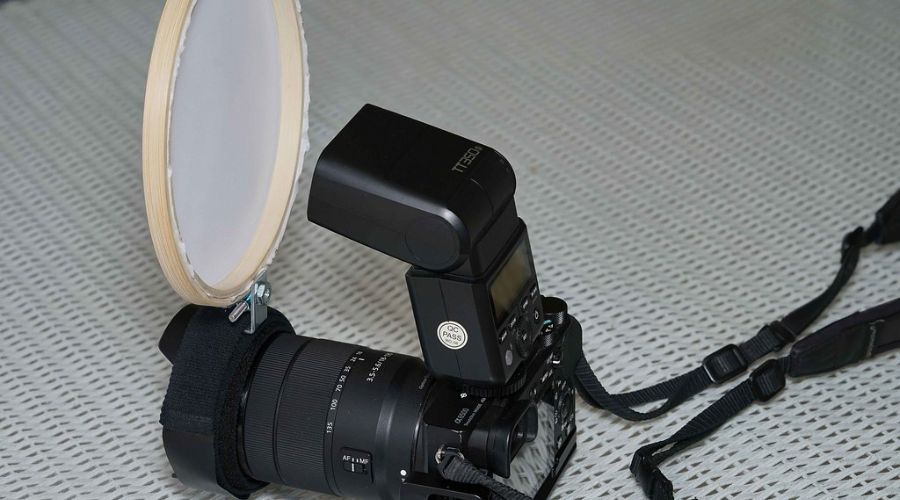
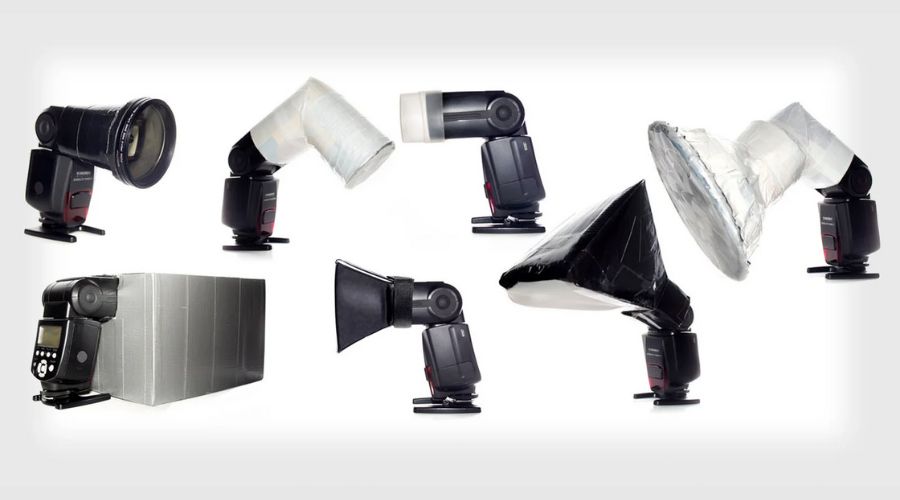
Luckiest for you, you don’t need to spend a fortune to get that professional look. Crafting a homemade diffuser can be as easy as pie.
For instance, attaching a piece of white tissue paper over the flash with a rubber band? Bingo!
You’ve got yourself a diffuser that takes the edge off that harsh light.
And talk about a budget-friendly fix! Don’t forget, it’s crucial to secure it properly unless you want to play catch the flying tissue paper during your photo shoot.
Reflectors as a Means of Diffusing Flash
Now let’s shine a light on reflectors. Using a reflector can bounce that bright flash to the heavens and back onto your subject for a softer touch.
Imagine using a shiny car sunshade: It’s like giving your subjects a suntan without the UV rays! All you need is something reflective, and bada-bing, bada-boom, you’ve taken the edge off the light.
Connecting sentence between subheaders: But let’s be real, sometimes ad-libbing with homemade gear feels like building a rocket with toothpicks and bubblegum, right?
So, how does it stack up against the store-bought stuff?
Comparing Professional Diffusers with DIY Options
Sure, DIY might give you a run for your money, but the pros typically have the edge with their fancy gadgets.
Professional diffusers are like the superhero capes of the photography world – built with purpose and flair. They’re designed to fit snuggly on your flash and disperse that light like a ninja spreading smoke.
While crafting a homemade solution is playful and can save you a few bucks, a pro diffuser generally brings more consistent results to the table.
So, weigh your options, consider your budget, and remember: a good photo is like a good joke—if you have to explain it, it just didn’t work.
Remember, your photos tell a story, so why not make it a bestseller with the right lighting?
Wrapping It Up: Flash Diffusers Demystified
Alright, you’ve taken the plunge into understanding what a flash diffuser is and how to wield its magic.
Remember, it’s that nifty little gadget that softens the light from your flash, making your photos look as smooth as jazz on a Sunday morning. It’s not rocket science to use it, just slap it on your flash and watch the harsh shadows and glares say, “Peace out!”
Think of it as sunglasses for your camera, keeping the bright light from blinding your subjects and preserving the natural vibe of your snapshots.
Whether you’re capturing your niece’s toothless grin or a friend’s impromptu kitchen dance move, your diffuser is your secret weapon for photos that are easy on the eyes. The difference will be as clear as day and night—literally.
So go ahead, slap that diffuser onto your flash and start snapping. You’ll see how it takes your pics from “meh” to “Wowza!” faster than you can say “Cheese!”
Remember, your snapshots will tell the tale, and with your new diffuser in hand, you’re set to make them novel-worthy. Happy shooting!
Frequently Asked Questions
What exactly is a flash diffuser?
Think of a flash diffuser as your camera’s best buddy that knows how to soften up. It’s a little attachment that sits on top of your flash and scatters the light. This nifty gadget spreads out that harsh camera flash so your photos don’t look like they were taken in a spotlight. It’s like a tiny umbrella for your flash, minus the rain dance!
Why should I use a flash diffuser?
Ever taken a photo that makes your friends look like ghosts caught in headlights? That’s the harsh snap of direct flash. A flash diffuser is your magic wand to wave goodbye to those sharp shadows and bleached faces. It gives you pictures with a warm, natural vibe. It’s pretty much a campfire for your camera flash, cozying up everyone in the frame.
How do I attach a flash diffuser to my camera?
Your flash diffuser is like a hat for your camera—it just pops right on top. Most diffusers have a snug fit or a simple strap to secure them. But don’t go all Hulk on it; gently does the trick. Like putting a lid on a jar of cookies: easy does it, so you can enjoy the goodies inside—stellar photos, in this case.
When is the best time to use a flash diffuser?
You know those indoor shindigs or evening events where the lighting is just not playing ball? That’s showtime for your flash diffuser. It’s a champ of dim-lit situations, evening the odds. But also, on a bright sunny day, it can soften the intense shadows on your subjects’ faces. So whether you’re dealing with too little or too much light, the diffuser’s got your back.
Can I use a flash diffuser for outdoor photography?
Heck yes, you can! When the sun’s beating down and creating harsh shadows on your subjects, a flash diffuser can be like a cloud passing by, making everything look cooler. It’s not just an indoor trick pony; outdoor shoots get a splash of awesome with the diffuser in the game.
Do I need a special flash diffuser for my camera model?
Not really. Flash diffusers are like one-size-fits-all socks—they stretch to fit most. But check compatibility to avoid a fashion faux pas with your camera gear. Most diffusers are versatile and work across various flash units, so you’re likely covered.
Are there different types of flash diffusers?
Oh, you bet! Some flash diffusers look like mini softboxes, whispering sweet nothing’s to your flash. Others are like clear caps, making the light more mellow. Then there are ones shaped like bounce cards, flipping the script on how light is thrown. Just like choosing a donut, pick the one that tickles your fancy and gets the job done.
Is it hard to learn how to use a flash diffuser effectively?
Nah, it’s a walk in the park. Snap it on, take a test shot, and see the magic happen. You might want to play around with the positioning and your camera settings to get cozy with it. But don’t sweat it; you’ll be diffusing like a pro in no time, making those memories shine without the glare.

