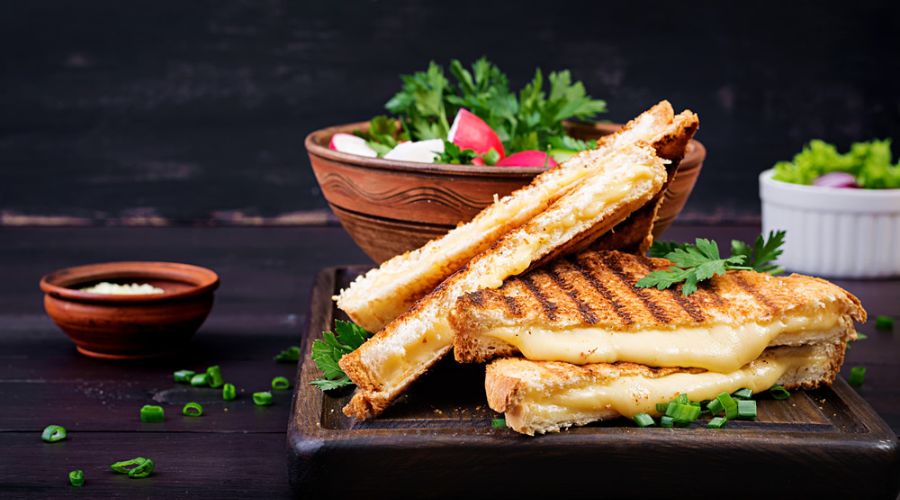
Essential Equipment for Food Photography
Jumping right into the thick of food photography? You need the right gear to make those dishes look delicious.
Imagine cooking up a storm and not having the right pots and pans. Same deal here, folks.
Let’s talk cameras, lenses, lights, and goodies to get your food photos to the top of the foodie chain.
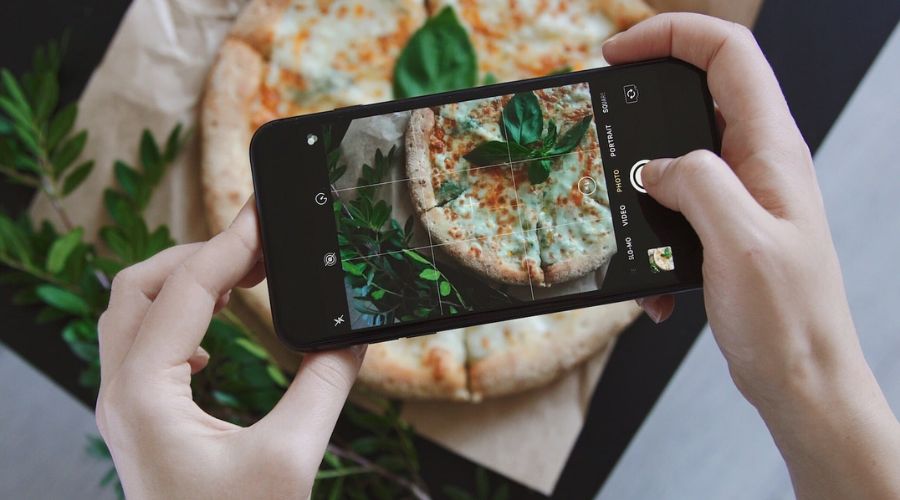
Choosing the Right Camera for Food Photography
You don’t need a camera that’s more complex than grandma’s secret recipe.
Start with a DSLR or a mirrorless number—both are champs in the food photography arena. Think crystal-clear images that’ll make viewers want to lick their screens.
Just remember, the best camera for food photography is the one that doesn’t break the bank or make your head spin. Simple is the way to go. You’ll be nailing those mouth-watering shots faster than you can say “cheese!”
Lenses and Their Impact on Food Images
Get up close and personal with a macro lens, or play it cool with a standard prime lens.
Details matter in food photography, like the tiny speckles on a blueberry or the steam on a hot bowl of soup. A macro lens can zero in on those details.
On the flip side, a 50mm prime lens is the Swiss Army knife in your kit. It’s versatile for table shots and won’t warp your food into unappetizing alien forms.
Keep it simple, keep it tasty, that’s the lens mantra to live by.
Lighting Equipment for the Perfect Shot
Lighting can make or break a food photo. You’re not trying to spotlight a fleeing raccoon; you’re highlighting a glorious piece of pie. Soft, natural light is your BFF here.
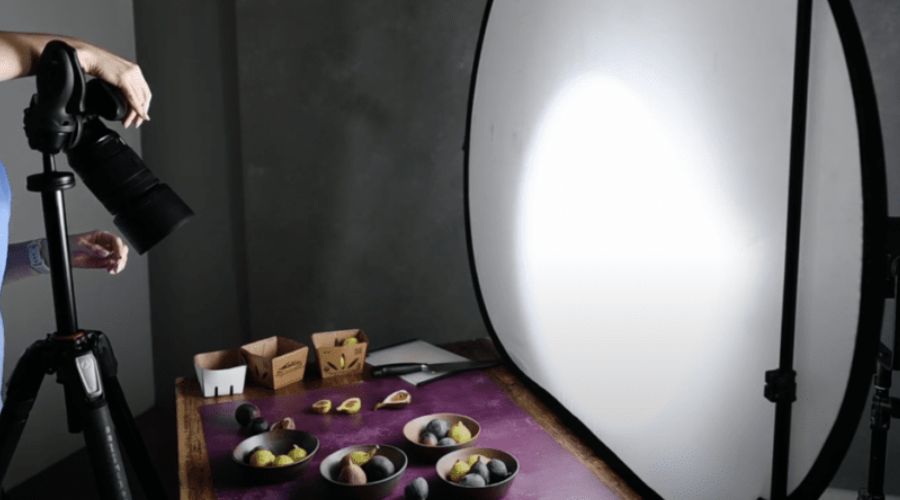
But if the sun’s playing hide and seek, nab an artificial light source. A diffuser or a reflector?
Oh, they’re like magic wands, zapping away unwanted shadows or bouncing light back onto dark areas.
Play around—it’s like conducting an orchestra, but your instruments are light and shadows, creating a symphony of yum.
Food Photography Accessories
This is where you can accessorize like it’s prom night—but for your food.
Tripods keep it steady, no shaky hands ruining the shot.
And reflector cards? Oh, they’re the unsung heroes, working the light like it’s Broadway. Plus, think about color.
A good backdrop can be the pepperoni on your pizza; it completes the picture. Mix it up, try new angles, and watch your food photos go from blah to ta-da!
Sometimes, it’s the little things that pack the biggest punch—in flavor and photography.
Armed with a few key pieces of gear, your food photography will be making taste buds tingle across the socialmedia.
The Art of Food Styling
Cracking the code of food photography often starts with mastering the art of food styling.
It’s not just about plopping dinner on a plate; it’s a craft where each detail counts. You’re setting the stage to make mouths water with just a glance.
Like a magician, your hands will arrange and tweak until the scene before the camera looks good enough to eat.
Principles of Food Styling
Before you start snapping pictures, you’ve got to know the groundwork.
Food styling hinges on making dishes look fresh and vibrant. Color contrasts and balance are your best friends.
Experiment with different plates and backgrounds – a stark white dish can make colors pop.
Mind the textures too; smooth mashed potatoes may sing next to the crunch of a glistening roast chicken. Get that food dressed to the nines!
Tips for Making Food Look Appetizing on Camera
You’re aiming for that “I can almost taste it” reaction.
Play with angles – looking down on a pizza can catch all the toppings, while a side view might best capture the layers of a burger.
Don’t be afraid to get up close and personal; sometimes, zooming in on those juicy berries can be as tantalizing as the whole tart.
Play around with lighting as well; sometimes, moody lighting can add as much flavor to a photo as a pinch of salt does to a dish!
Common Food Styling Tools
In your food photography quest, arm yourself with a treasure trove of tools.
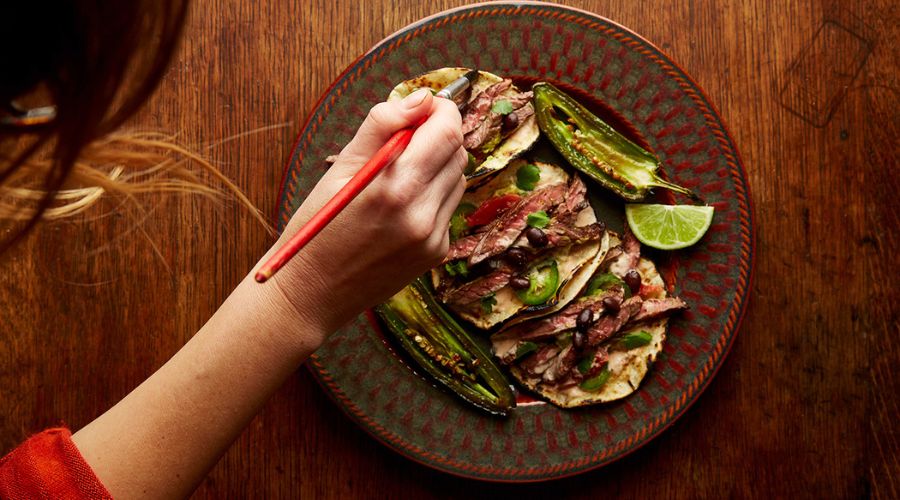
Tweezers are a godsend for placing tiny herbs. Brushes will let you glaze a cake with precision. And a trusty spray bottle filled with water can bring back the luscious look to wilting veggies.
With these gadgets at the ready, you’ll be the MacGyver of food photography!
Remember, capturing the essence of a dish isn’t about snapping a hundred shots hoping one will stick. It’s about weaving a visual tale with composition, color, and texture that has folks virtually sinking their teeth into every image.
Lighting Techniques in Food Photography
You’re knee-deep in the kitchen, your hands artfully arranging a plate of the most appetizing bruschetta—ripe tomatoes on toasted bread that’s just begging to be devoured.
But before you dive in, remember, in the flavorful playground of food photography, lighting is king!
Get it right, and your photos will have folks drooling over their screens.
Understanding Natural vs Artificial Light
Let’s talk sunbeams and light bulbs.
Natural light is like that cool buddy who always makes you look good without trying too hard. It’s free, and it flatters your food if you catch it at the right time.
On the flip side, artificial light is like having a magic wand; you can whip up the perfect glow anytime, whether it’s midnight or cloudy.
Both have their perks, so your job is to figure out which one brings out your dish’s best side.
How to Create the Best Lighting Setups
Ready to set the stage? If you’re sun-chasing, park your plate by a window where the gentle light kisses your dish.
But beware, nobody likes a harsh, midday glare—so, if the sun’s playing too rough, tame it with a sheer curtain.
Flashing lights? Not at the food table! Grab some lamps with diffusers instead; they’re like soft blankets of light, keeping everything cozy and appealing.
And keep this nugget in your apron pocket: angles are everything. Side lighting sharpens textures, while backlighting gives a heavenly halo glow.
Experiment like a food scientist with a camera, and you’ll nail that jaw-dropping shot.
Manipulating Shadows and Highlights
Picture this: you’ve got a moody cheesecake, sitting there looking all sultry and shadowy.
Shadows, my friend, they’re the secret sauce. They add drama, depth, and let’s not forget a pinch of mystery to your shots. But play nice, don’t let those shadows steal the whole spotlight. Balance them out with some highlights to show off that cheese cake’s creamy complexion.
Use reflectors—white cards, or even a shiny aluminum foil, to bounce light around like it’s a mini food disco. That way, you’ll capture every velvety crumb and glossy berry in their Sunday best.
Remember, in the big, delicious world of food photography, it’s all about serving up those mouth-watering shots with a side of style.
Composition and Angles in Food Photography
Food photography isn’t just about snapping what’s on your plate.
Crafting that perfect shot can feel like a bit of a jigsaw puzzle with you trying to fit all the right elements together. Think of it as setting the stage for your food to strut its stuff.
Now, let’s dive into how you can make that dish look as tantalizing through the lens as it does on your fork.
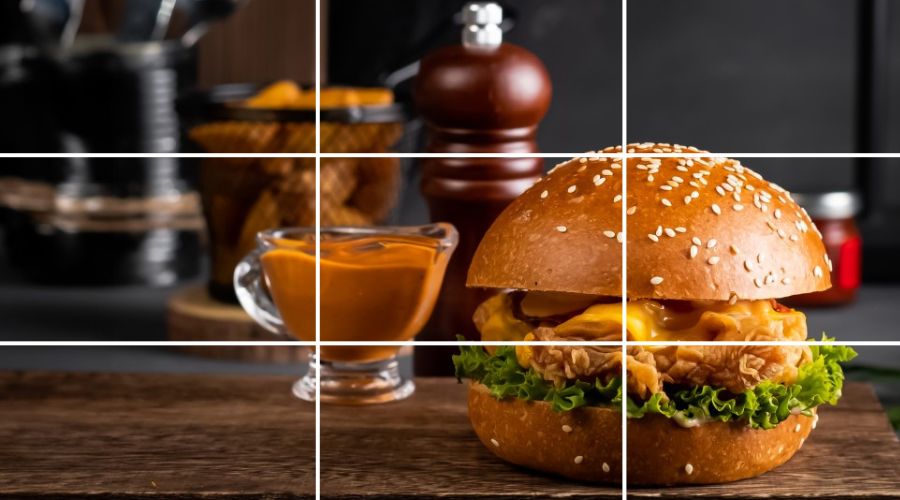
Rules of Composition: The Rule of Thirds and Beyond
Imagine a tic-tac-toe board laying over your image. The rule of thirds says putting the good stuff at the intersections or along the lines makes for a photo that’s easy on the eyes. This frames your food so naturally, folks can’t help but drool over it.
But don’t stop there – lead their eyes on a culinary adventure. Place a fork teasingly beside the plate or sprinkle some herbs, guiding the gaze across the flavors and textures.
Selecting the Best Angles for Different Types of Food
High, low, to the side? Choosing the right angle for the grub in front of you is a cinch with a bit of know-how.
Tackle a towering burger from the side so you can show off all those layers.
On the flip side, for dishes like pizza or a plate of cookies, go for a bird’s-eye view. You’ve got to flaunt those toppings and textures!
Using Depth of Field to Your Advantage
Depth of field is like a magician’s trick for your photos, making the food pop while the background fades into a dreamy blur.
With a shallow depth of field, you’re telling your audience, “Hey, look right here; this juicy tomato is the star of the show.” Using this technique helps eliminate distracting backgrounds, keeping the focus where you want it – on the dish.
Remember, your goal is to make the viewer’s stomach rumble.
Post-Processing and Editing Food Photographs
Once you’ve snapped some delicious shots, food photography becomes a digital chef’s game. Post-processing is the secret sauce that can make your images go from good to mouthwatering.
Let’s dive into the digital kitchen and talk about how to season your photos to perfection.
Software Options for Editing Food Photos
You’ve got a buffet of software options for editing those yummy pics. While pros might lean on Adobe Photoshop for its extensive toolkit, don’t fret if you’re not ready to shell out some dough.
Adobe Lightroom works wonders for color correction and is a bit friendlier for beginners.
And for those on a tight budget, GIMP is a free alternative that still packs a punch. Think of it as the food truck of editing software – convenient, effective, and easy on the wallet.
Basic Editing Techniques to Enhance Food Images
Tweaking food photos is like seasoning a dish – a pinch here and a dash there can transform the flavors.
Simple adjustments like brightness, contrast, and saturation are your salt, pepper, and olive oil.
Crank up the brightness to make those colors pop, but don’t overdo it, or you’ll wash out the photo like overcooked pasta.
Play with the contrast to give your image some punch, and adjust saturation for that golden-brown toast look instead of a burnt-burger vibe.
Advanced Editing Tactics for Professional Results
Digging a bit deeper into your photo editing toolbox can yield some blue-ribbon-worthy photos.
Layers can seem tricky, but they’re a lifesaver for non-destructive editing. Think of layers like stacking your sandwich – each ingredient adds flavor without mashing the bread.
Masking is another technique; imagine using cookie cutters to adjust only parts of your image – like brightening just the berries on your tart.
Once you get the hang of it, you’ll be playing with your food photos like a TV chef tosses a salad.
Food Photography for Bloggers and Influencers
For you bloggers and influencers, food photography is the secret sauce to making your followers drool over your content.
Let’s be real, a picture is worth a thousand cravings, and you want to snap that shot that sends taste buds into overdrive.
With the right angle and a dash of creativity, even a simple sandwich can look like a gourmet masterpiece. Remember, your camera eats first!
How to Capture Engaging Food Photos for Social Media
Lights, camera, appetize!
To capture engaging food photos, you don’t need a fancy setup, just a sprinkle of know-how. Find natural light to give your dish some sunshine love – it’s like Mother Nature’s photo filter.
Keep it sharp; focus on the yummiest part of the meal to make it pop. And please, ditch the digital zoom. Get up close and personal by moving your feet instead of pinching that screen.
Colors are your pals; play them up like you’re the DJ at a salad bar. Vibrant veggies, sizzling sauces, and cool condiments; mix ’em up for a visual feast. And think about shapes and sizes. A zigzag drizzle of cream on a velvety soup? Now that’s how you play with your food in style.
The Role of Storytelling in Food Photography
Tell me a story, will ya? Each of your food photos should be telling a tale that tickles the imagination.
Maybe it’s Sunday brunch with a side of sunny-side-up eggs and laughter. Or perhaps a slice of pie that whispers ‘Grandma’s kitchen’ with each berry.
Your followers want to taste the story as much as they want to taste the food. Give them a spoonful of narrative with every click.
A picture of cookies? Snore. But cookies spilled from an overflowing jar with a glass of milk standing by, as if waiting for a dunking session?
Now that’s a cookie caper waiting to happen. Serve stories, not just snacks.
Collaborating with Brands and Restaurants
Snapping for snacks? Partnering up with brands and restaurants can be a win-win. They get the eye-candy content, and you get to flex your foodie muscles (and maybe munch on some freebies).
But keep it real; authenticity is the name of the game. Only team up with spots that make your foodie heart sing, so your passion shines through the lens. No one likes a sell-out salad.
Show off that chef-special like a proud parent. Talk about the sizzle, the seasoning, or the secret sauce.
And hey, shoutout to the maestro behind the meal because chefs are the unsung heroes of your food story.
Next thing you know, your followers aren’t just liking your posts, they’re lining up at the restaurant. That’s the power of tasty teamwork!
Wrap It Up with a Snap!
You made it to the end of our fun-filled food photography journey!
Remember, snapping pics of your grub isn’t just about making your friends drool on social media. It’s about catching the essence of yum on camera. You’ve got this – point, shoot, and munch away!
With a few tips under your belt, your food snaps are bound to be as tasty as the dishes themselves. Keep it simple, keep it snappy, and let those colors pop. Your inner circle will be begging for your secret recipe for picture-perfect eats.
So, go ahead, give your meals the spotlight they deserve. After all, there’s no need for fancy lingo; a good food photo speaks a thousand words (or maybe just one: delicious!). Catch you on the flip side – camera in one hand, fork in the other!
Frequently Asked Questions
What is food photography and why should I care?
Guess what? Food photography is like taking your taste buds on a photo shoot! It’s snapping pictures of food in a way that makes your mouth water. If you run a food blog, restaurant, or just love sharing your meals on Instagram, nailing this can turn your so-so dish into a feast for the eyes.
Do I need a fancy camera to start food photography?
Heck no! While a high-end camera can add some bells and whistles, your trusty smartphone can work magic too. It’s not just the gear but your eye for delicious details and a bit of know-how that’ll serve up stunning shots.
What’s the best lighting for capturing my culinary creations?
Let the sun shine in! Natural light is your best pal for food photos. It’s like Mother Nature’s spotlight on your edible masterpieces. Sidle up to a window and let it brighten up your dish, but watch out for those sneaky shadows.
How important is the background in food photography?
Think of your background like the buns to your burger; it’s gotta be good, but it shouldn’t steal the show. Keep it simple and non-distracting. A clean counter or a rustic wooden board can do wonders without upstaging your yummy subject.
Can you give me a quick tip for making my photos look professional?
You betcha! Here’s a little nugget of wisdom: get close and cozy with your food. A close-up shot can capture all those juicy details, making folks feel like they could just reach out and grab a bite. Oh, and don’t forget to focus! Blurry food is a no-go.
What’s the biggest mistake rookies make in food photography?
Easy peasy. The rookie slip-up is treating all food the same. Your dish has personality, so let it shine! Find its best angle and play with colors and textures. It’s like setting up your food on a blind date; you want it to make a fantastic first impression.
Any last nuggets of advice for a food photography newbie?
One word: practice. Just like flipping pancakes, the more you do it, the better you get. Try different styles, angles, and props. Share your photos and ask for feedback. Remember, Rome wasn’t built in a day, and neither is your portfolio. Snap, eat, repeat!

