Preparation and Planning
Snapping a killer shot of the briny deep starts long before you dip your toes in the sand. It’s all about the groundwork, folks.
Researching Your Location
Hit the books – well, okay, the internet – to scope out the must-photograph spots. Check out what other shutterbugs are saying about your dream location.
Trust me, it pays to know the lay of the land, or should I say, the curve of the coast, before you even pack your bags.
Identifying the Best Time for Ocean Photography
Crack of dawn or magic hour? These are more than just pretty times of day. The right light can make or break your ocean shots.
Get familiar with the light like it’s your new best friend and plan to shoot at golden hour for those soft, warm hues that’ll make your photos pop.
Understanding Tides, Weather, and Seasonal Changes
Mother Nature’s mood swings can turn the tide of your photo expedition. Peek at the weather forecast to sidestep those gloomy, overcast days. And tides – keep an eyeball on them.
Low tide can expose textures and treasures that add oomph to your shots. Plus, don’t forget, seasons bring their own spice to the sea. Winter waves or summer serenity? Your pick.
Camera Settings and Techniques
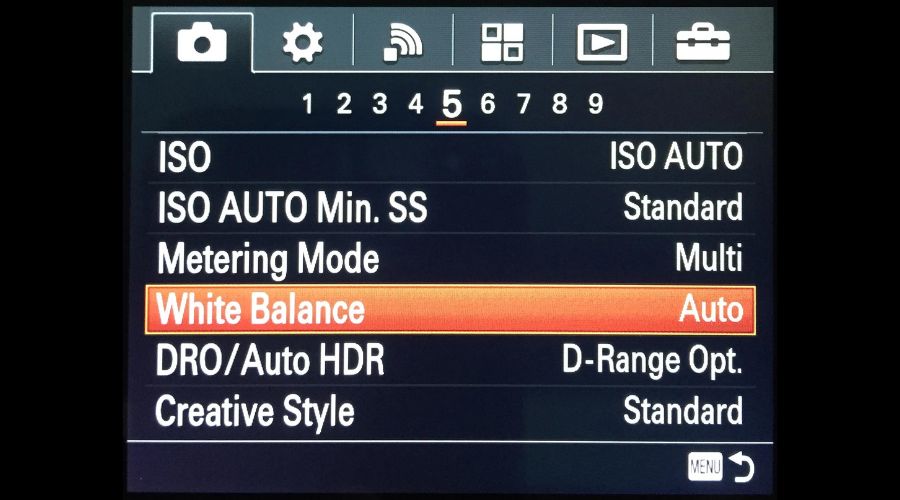
Optimal Camera Settings for Ocean Shots
Picking the right camera settings is like choosing the right bait for fishing – it can make a world of difference.
Crank up that shutter speed if you’re after crisp, frozen-in-time waves. A speed of 1/1000 second should do the trick.
For a smooth, creamy look to your water, slow it down to a few seconds – just make sure your camera’s steady as a rock on a tripod.
Your aperture? It’s your oyster! Go wide (like f/2.8) for a shallow depth of field, or narrow (f/11 or more) if you want everything sharp from front to back.
Mastering Shutter Speed for Dynamic Water Motion
Want to catch the dance of the ocean in all its glory? Shutter speed is your DJ.
A fast shutter clicks with the beat of splashing waves, and a slow one grooves with the languid roll of the tide. Experiment like a mad scientist to find the sweet spot for the vibe you’re going for.
The Role of Aperture and ISO in Seascapes
Aperture’s kinda like the pupil of your camera’s eye – it controls the light and depth.
A peephole-sized aperture (high f-number) keeps everything crystal. ISO’s your camera’s coffee – the higher it is, the more ‘awake’ your camera is in low light, but too much and it gets jittery with grain.
Keep it low and steady for those early morning or twilight ocean scenes.
Using Filters to Enhance Ocean Photography
Filters can be the secret sauce to your ocean pics. Pop on a polarizing filter to cut through glare and make those blues pop.
ND filters? They’re like sunglasses for your camera, perfect for long exposures in bright light. And don’t forget grad ND filters – they’ll even out those skies and keep your horizons sharp as a shark’s tooth.
By sticking to these basics, you’ll have a good starting point for capturing the sea in all its majesty.
Remember to play around and have fun – that’s where the real magic happens! Keep an eye on the horizon and a finger on the shutter; you never know when Neptune might show off just for you!
Composition Tips for Ocean Photography
So, you want to capture the boundless beauty of the sea?
Keep in mind these tips for ocean photography to make a real splash with your images. Ready to dive in?
Incorporating the Rule of Thirds on the Waves
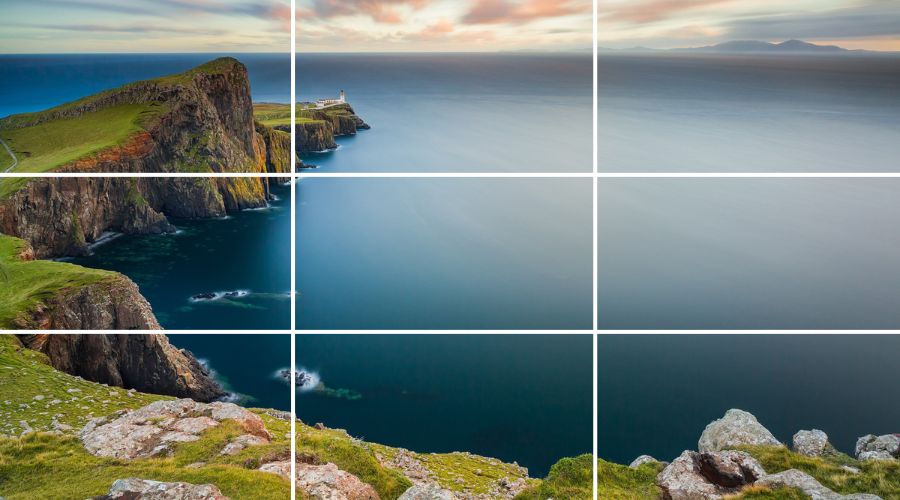
Catch a wave with the rule of thirds—it’s like surfing with your camera.
Imagine your viewfinder is a tic-tac-toe board. Now, place those rolling waves on these lines or where they intersect.
This trick keeps your photos from looking like a shipwreck—instead, they’ll look worthy of captain’s log.
Leading Lines and the Horizon in Ocean Imagery
Use the ocean’s horizon as a straight-edge ruler—keep it level unless you’re purposely tilting for a bit of fun.
You can also make a beeline for beauty with leading lines. Think of a pier pointing out to sea or footprints in the sand guiding the eye. Leading lines lure the looker into your photo, hook, line, and sinker.
Framing Ocean Scenes with Natural Elements
Peek-a-boo with palm trees or frame a lighthouse with rocky cliffs—it’s like nature’s own Instagram filter.
This technique adds a sprinkle of context and helps your audience feel like they’re discovering a hidden gem. Plus, it’s a great way to say, “Here’s a window to another world!”
Capturing Scale and Depth in Ocean Landscapes
To give your ocean pics some oomph in scale, include a surfer or a seashell in the foreground.
It’s like comparing a minnow to a whale—it shows off how epic Mother Nature is. Depth turns a flat photo into a deep dive, keeping eyes anchored longer on your shot.
Lighting Considerations
Catching the perfect wave in your ocean photography often boils down to one major factor: lighting.
Let’s dive into some tips that’ll help you snap that dazzling seaside shot with just the right touch of sunlight or moonlight.
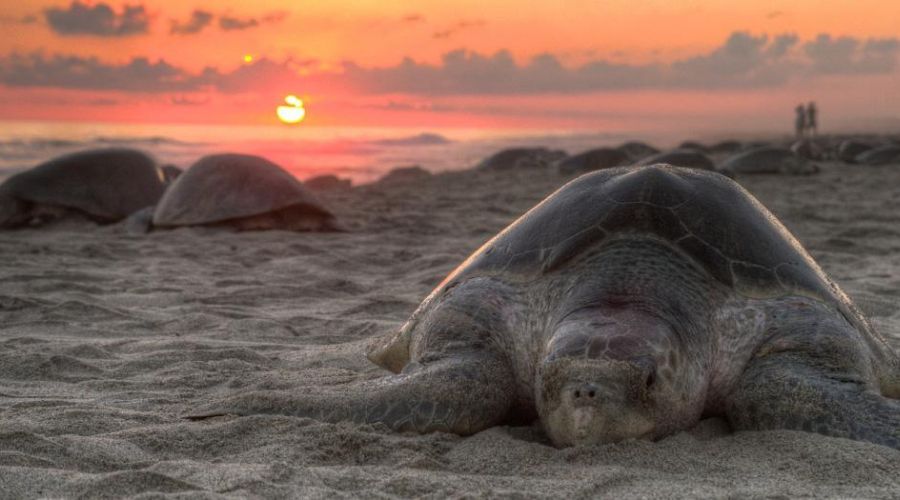
Making the Most of Golden Hour Over the Ocean
They say the early bird catches the worm, but for you, it’s all about catching the light.
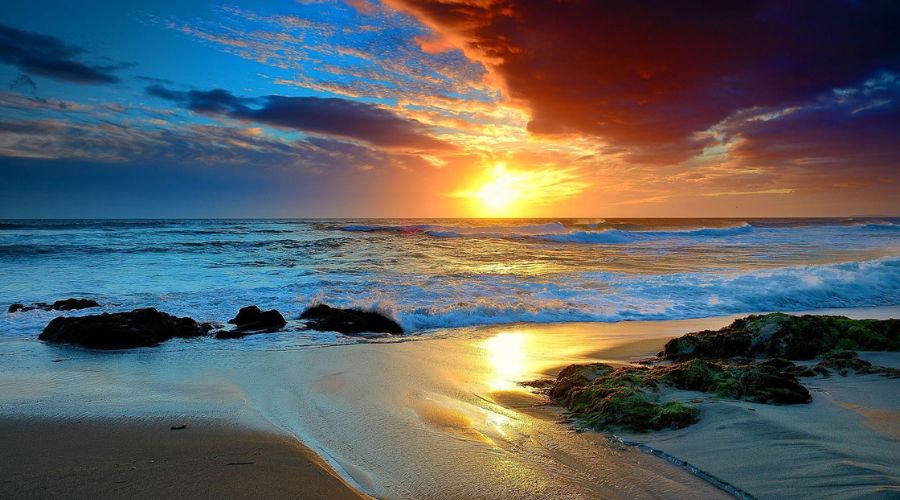
Golden hour is your ticket to those warm, painterly hues that can turn a ho-hum seaside photo into a masterpiece. This magical time is right after sunrise or just before sunset. What’s the trick? Aim for simplicity.
Position the horizon line, get that sun peeking at the edge, and let Mother Nature do the rest. Just remember to hustle – golden hour waits for no one, and you’ve got about an hour of this glimmering light show.
Challenges and Opportunities in Overcast Conditions
Gray sky got you down? Don’t fret! Overcast days can be a secret weapon. Think of the cloud cover as a massive flash diffuser for the sun, giving you even lighting that’s perfect for capturing detail in the waves without harsh shadows.
Sure, you might miss the dramatic splashes of color, but in return, you get a moody atmosphere that tells a different kind of ocean story.
Grab your camera when the sky is a blanket of clouds; it’s a chance to shoot the sea in a new light – literally and figuratively.
Night-Time Ocean Photography and Capturing the Milky Way
When the sun ducks out, the stars strut in. Night-time by the ocean is your chance to snap something truly out of this world: the Milky Way.
You’ll want to plan this photo session – check the lunar calendar and aim for a new moon night to sidestep light pollution from our bright buddy in the sky.
A tripod’s your best pal here, as you’ll need long exposures to capture those twinkling stars over the waves. Pick a spot away from city lights, let your eyes adjust to the darkness, and prepare to be star-struck by the results. Just be sure not to take a dip; cameras, like cats, are not fans of unexpected swims.
With these tips in hand, you’re all set to tackle the lighting challenges that the ocean tosses your way.
Tips for Action and Wildlife Photography in the Ocean
Plunging into the briny deep for that perfect shot? Here are your tips for capturing the symphony of the sea.
First off, you’ll want to get comfy with the basics of ocean photography. Get ready to freeze those frenzied fins in action and snag a snapshot of the shy critters lurking below!
Techniques for Capturing Sea Life in Motion
Timing is everything when you’re trying to photograph a whale doing a backflip or a dolphin playing tag.
Your best friend here is burst mode. This lets your camera fire off a rapid series of shots, nabbing that spit-second dream shot.
Make sure to set a fast shutter speed; think hare, not tortoise! Keep your lens pointed where the action’s at and, like a sea eagle eyeing fish, be patient and ready. A sprinkle of luck doesn’t hurt either!
For those smooth, sweeping shots, panning is your go-to move. Follow your subject with a steady hand and click away as it glides by.
You might not nail it on the first try, but don’t throw in the towel! Practice makes picture perfect. And hey, if your snaps come out as clear as mud, just laugh it off. There’s always a next wave!
Considerations for Close-Up Shots of Marine Creatures
Close-ups can be as tricky as finding a seashell in a surf shop. But when you do get up close and personal with a sea star or nudibranch, it’s all about the light.
Don’t shine your flashlight right at them like an alien abduction; you’ll want a diffuser to soften the glow. And keep a safe gap between you and your underwater pals. This isn’t a game of bumper boats!
One more thing: angle is key. Come at your subject from the side and you may glimpse a sparkle in a sea turtle’s eye. Shoot from below, and that stingray might look like it’s flying across a blue sky.
Just remember, your marine muse may not stick around for an encore, so make your shots count. If you flub it up, just laugh and say you were going for abstract art!
Respect and Safety While Photographing Ocean Wildlife
Don’t be a bull in a china shop. These oceans aren’t just blue playgrounds; they’re homes to a kaleidoscope of critters. So respect their space.
Don’t go prodding an octopus to get it to pose or chase after a turtle for a selfie. Not cool. Think of yourself as a guest at a wild, underwater fiesta—be polite, mingle without causing a ruckus, and leave everything as you found it.
Now, you’re not just dealing with animals; you’re also tangling with Mother Nature herself—cue the dramatic music. The ocean can flip from calm to a scene from a disaster movie faster than you can say “camera.”
Always check the weather and know your limits. No snapshot, no matter how epic, is worth tangling with Poseidon’s wrath.
Overcoming Challenges in Ocean Photography
Tips for ocean photography can be a lifesaver when you’re battling the elements of Mother Nature. When the sea breeze kicks up a fuss, your camera gear can take a beating.
But hey, no pain no gain, right? Let’s jump into keeping your gear in shipshape while you’re snapping those killer ocean shots.
Dealing with Salt Spray and Sand on Equipment
Salt spray is like that uninvited guest at a beach party—it’s always there, and you can’t ignore it.
But you can fight back with a trusty lens filter to shield your camera’s eyes. Think of it as sunglasses for your camera.
And just like you wouldn’t go to the beach without a towel, don’t forget a soft cloth. It’ll come in handy to gently wipe away any salty kisses from the sea.
As for sand, it’s sneakier than a crab on tiptoes. Keep your gear off the ground with a stable tripod, and store it in a sealed bag quicker than you can say ‘surf’s up!’ The less time your camera spends playing in the sand, the happier it will be.
Troubleshooting Common Issues in Harsh Coastal Conditions
Now, let’s talk about the mood swings of coastal weather. One minute it’s all sunshine and rainbows; the next, you’re in a twist-and-shout match with the wind.
To keep your shots from getting blown away, anchor your tripod with a trusty weight, like your camera bag. It’s like giving your tripod sea legs.
And don’t forget, timing is everything. Chase the light when it’s playing nice for that perfect golden hour glow.
Just remember, clouds can be drama queens, ready to spill their guts any second. Always have a waterproof cover handy, or you’ll be doing the wet camera shuffle all the way home.
By keeping these tips for ocean photography under your belt, you’ll be more prepared than a seagull at a fish fry.
Catch the Wave to Ocean Photography Success
You’ve dipped your toes into the vast ocean of knowledge for snapping the perfect wave pic. Now, it’s time to make a splash with your newfound skills in ocean photography.
Remember, practice makes perfect. So get out there, camera in hand, and let the sea be your muse.
Never forget to respect Mother Nature’s power—she’s the ultimate boss of the beach. Safety first, epic beach shots second. Keep your eyes peeled, too. Sometimes, the most stunning shots come from the least expected moments. A dolphin photobomb? Yes, please!
Stay salty, my friend, and keep chasing the horizon. Your oceanographic exploits will surely reel in some epic memories. Here’s to your next beachside adventure—may your photos be as epic as the stories you’ll tell.
Frequently Asked Questions
What’s the best time of day to capture ocean photos?
You’re in luck if you’re an early bird or a night owl. Golden hour is your time to shine. This is right after sunrise or just before sunset. The sun plays nice during these hours, giving your snaps a warm, golden glow. So set your alarm, or take an evening stroll by the shore with your camera in hand.
Do I need fancy equipment for ocean photography?
Not at all! Your trusty smartphone or a basic camera will do just fine when you’re dipping your toes into ocean photography. Start with what you’ve got and get a feel for it. After all, it’s the magician, not the wand, that makes the magic happen. And you, my friend, are the magician with a camera.
How can I keep my camera safe from water and sand?
Camera gear doesn’t like to swim! Keep it safe by using a waterproof case or bag when you’re near the water. A good ol’ plastic bag can work in a pinch to keep the sand at bay too. Remember, it’s better to play it safe than to have a camera go belly up in the ocean!
Any tips for capturing the motion of the ocean?
Wanna catch those waves in action? Try using a slower shutter speed. This little trick will make the water look smooth as glass or show off its power in a freeze frame. Mess around with the settings—practice makes perfect, and you’ll get the hang of it!
Should I use a tripod for ocean photography?
If you’re after stability, a tripod’s your best pal. It’ll hold your camera steady as a rock while you capture those wave crashes and sunsets. But if you prefer to go freehand, that’s cool too. Just keep a steady grip and let the good times roll!
Can I shoot ocean photos on a cloudy day?
Cloudy days are like the unsung heroes of photography. The clouds scatter the sunlight, so you won’t get harsh shadows. Plus, they add some drama to the sky—kind of like a moody backdrop for your ocean pics. So don’t let a little cloud cover rain on your photography parade!
What settings should I use for ocean pictures?
Keep it simple, slick. Start with a small aperture (a higher f-number) for a wider depth of field. That way, you’ll get most of the scene in focus. Tweak the shutter speed based on what effect you’re after with the water. Remember, trial and error are your friends here. Snap away and see what looks good!

