Essential Equipment for Levitating Color Splash Photography
Your journey into the cool pool of levitating color splash photography starts with the right gear.
Like a painter with a brush, you’ll need a few key tools to create your masterpiece.
Camera and Lens Recommendations
Let’s get down to brass tacks. You need a camera that can freeze a moment in time like a superhero stopping a runaway train.
Any DSLR or mirrorless with a manual mode will do the trick.
Now, pair that camera with a lens sharp enough to cut through the confusion of beginner photography blogs.
A 50mm f/1.8 is a real sharpshooter, and it won’t make your wallet weep. It’s a dynamite duo for capturing those flying droplets in all their glory.
Choosing the Right Tripod
Next, you’ll want a tripod that’s sturdier than a century-old oak tree. This trusty three-legged friend will keep your camera steadier than a surgeon’s hand.
Remember, a wobbly tripod is like a jittery squirrel — it can spoil the whole shot.
Necessary Accessories for Color Splashes
For the grand finale of color explosions, you’ll need a few more knick-knacks.
Think of it as equipping your utility belt. You’ll want a remote trigger to snap pictures at lightning speed without shaking the camera.
A flash is also key — it’s like a lightning bolt that’ll make your colors pop.
And of course, water and food coloring: mix them like a mad scientist eager to create a splashy rainbow. Weld these tools together, and you’re all set to dive into some splash-tastic fun.
Setting Up the Scene for Levitation
How to photograph levitating color–it sounds like magic, doesn’t it?
Well, grab your wand–or rather, your camera–because you’re about to create some spellbinding images.
First things first, let’s chat about the stage where your photo trick will take place.

Finding the Perfect Location
Now, you don’t need a fancy studio to pull off this trick. Scout for a spot with plenty of space to splash around. An area with a clean backdrop works wonders for making those colors pop.
Think about using a garage with a white wall or even your backyard. Make sure you won’t mind a little mess – because it’s going to get colorful!
Setting Up Your Subject for Levitation
Here’s where the “levitating” part comes in. You’ll need to suspend your subject in mid-air.
We’re talking fishing lines, clear thread, or even transparency film.
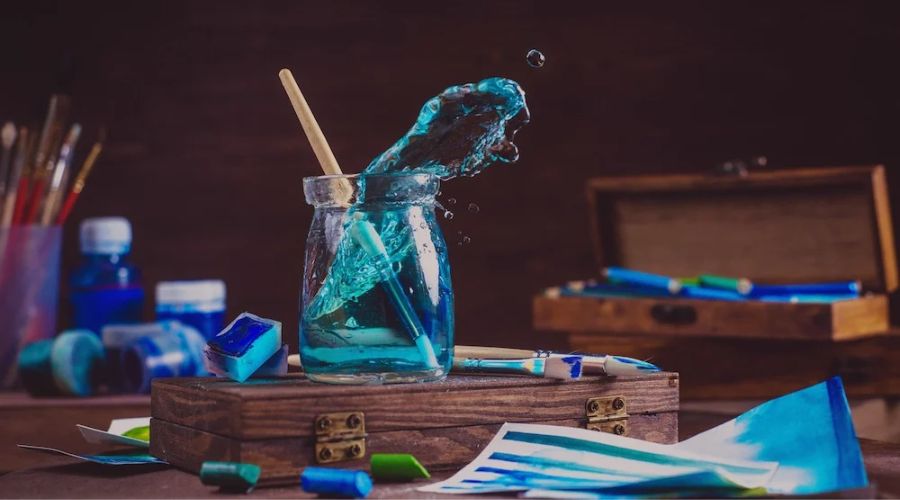
Attach your vibrant splash-makers – like bright paintbrushes or colorful fruit – to the lines. It’s like puppetry, where the strings magically disappear in the final act!
Considering Lighting for Dynamic Effect
Lighting is the secret sauce that adds the zing to your color splash shots.
If you’re indoors, a couple of flashes can freeze the motion like a deer in headlights. Outdoors?
The sun is your best pal. Position your setup so that the sunlight gives your colors that ‘wow’ factor but doesn’t blind the camera.
Remember, the goal is a photo that screams fun, not one that just whispers ‘nice’.
Camera in hand and a scene set for some high-flying vibrancy, you’re ready to capture images that defy gravity and dazzle with color.
It’s all about the prep, and with your space ready and your subject floating, it’s time to make a splash in the world of photography that’s sure to leave your audience thinking, “How in the world?”
When you’re eager to photograph levitating color splashing, grasping the camera settings is like grabbing the bull by the horns – it’s essential to get the timing and action just right.
So, let’s get down to brass tacks and talk shop about your camera settings. They’re your golden ticket to snagging that perfect mid-air moment with all the colors dancing around like nobody’s watching.
Camera Settings for Capturing the Perfect Levitating Shot
Now, this isn’t a walk in the park, but it’s nothing you can’t handle!
You’ll want to start by revamping your shutter speed because you’re on a mission to freeze time, superhero style.
Adjusting Shutter Speed for Motion Capture
Think fast! That color splash won’t hang around all day.

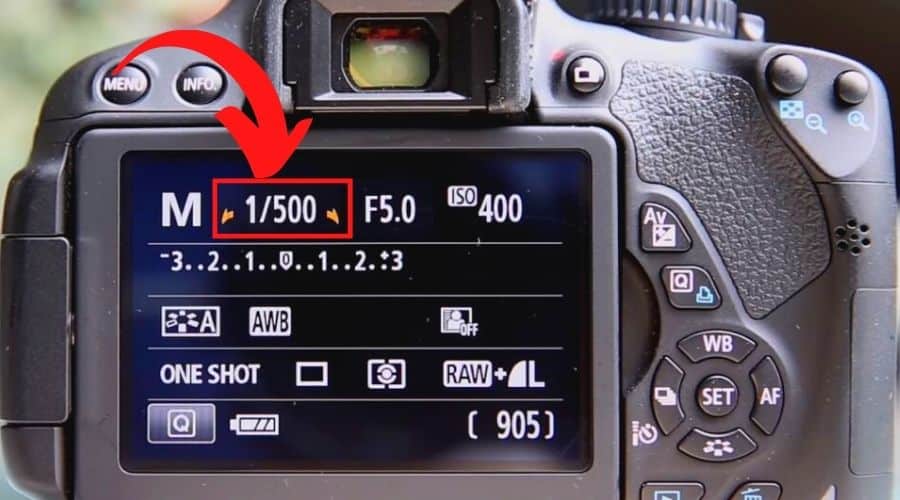
You’ll need to tweak your shutter speed so it’s faster than a New York minute—try setting it around 1/1000th of a second or faster.
This nifty trick helps you capture motion without letting the image turn into a blurry mess, as if the colors had a mind of their own.
Using Burst Mode to Your Advantage
Keep your finger on the pulse—and the button! Burst mode is like having a rapid-fire superpower at your fingertips.
It lets you take a series of shots in quick succession, so keep that shutter button down and let ‘er rip.
This way, you’ll have a better shot at nailing the perfect levitating action—the moment where everything looks as if it’s hanging in mid-air by magic.
Ideal Aperture and ISO Settings
Here’s the deal: you’ll want a sharp subject and a background softer than a down pillow. Crank that aperture to a lower number, which might be around f/4 or f/5.6, to keep your levitating object in sharp focus.
Keep the ISO as low as your nerves on a lazy Sunday—this keeps the grain to a minimum.
You’re shooting for crystal-clear splashes of color, not a grainy mess that looks like it’s been through the digital wringer.
With your camera now primed and ready, you’re just a hop, skip, and a jump away from capturing those gravity-defying moments.
Remember, keep your eyes peeled, your reflexes quicker than a hiccup, and shoot for the stars—or at least for some colorful splashes hanging in the air like they don’t care!
Executing the Color Splash Effect
Imagine capturing a splash of rainbow colors, suspended in mid-air as if by magic. That’s splash photography for you.
To get this fantastic shot, you’ll need to combine a quick shutter, precise timing, and a bit of fun science. Let’s dive into the colorful adventure that awaits you.
Choosing the Right Colors for Impact
When you’re picking your palette, think eye candy—vibrant, intense, and full of life.
Go for contrasts that pop and colors that make you feel like you’re at the best party ever.
Remember, you’re painting with water and light, so whether it’s electric blue against sunset orange or neon pink dancing with lime green, make it bold, make it bright, and above all, make it scream “wow”.
Timing Your Splashes for Maximum Effect
Timing is everything when you’re aiming to freeze those wild splashes in place. You’ll want to be as snappy as a gator chomping on a juicy steak.
Set your camera to burst mode and use a shutter speed faster than a New York minute. This is the part where you and your camera need to be in perfect harmony—like peanut butter with jelly, or macaroni with cheese.
Safety Precautions and Protective Measures
Now, as fun as this all sounds, let’s not forget that safety’s the name of the game.
Protect your gear like it’s your baby, because nobody wants a camera that’s taken a bath in color splash soup.
Cover up, suit up, and shield your equipment as if you’re preparing for a paintball showdown. And yourself? Don some goggles and a raincoat, because it’s going to get messy and you’re smack in the splash zone!
Post-Processing Techniques
After capturing your levitating color with your splash photography techniques, making it pop is your next mission.
The magic largely happens in post-processing, where you’ll turn good photos into jaw-dropping spectacles.
Remember, no woolly content here; let’s dive straight into making your art gallery-ready.
Editing for Levitation: Removing Supports
First up, let’s tackle the gravity-defying illusion.
You likely used some strings or supports to achieve that levitating effect, but in the finessed final product, they’ve got to vanish.
Using a photo editing tool, zoom in and patiently erase every hint of the supports.
Think of it like playing hide and seek with pesky pixels – you’re it, and every strand of support needs to be out of sight!
Enhancing Colors in Post-Processing
Now for the splash of color in your photos – it should be as vibrant as a rainbow after a summer storm.
Tweak the saturation, vibrance, and contrast sliders to amplify those hues. I’m talking about dialing up the drama so that every droplet sings with color. But keep a keen eye; it’s like seasoning a dish, where a pinch too much can spoil the stew.
Merging Photos for the Final Composition
With your supports gone and colors popping, it’s time to bring it all together.
If your masterpiece is a blend of multiple shots, layer them like the world’s most artistic lasagna. Align them just right, using masks to keep the parts you want and discard the rest like last-year’s fashion.
The end result? A seamless image that looks like you’ve just bottled a bit of magic.
And remember, while you’re whipping up this concoction of levitating eye-candy, keep things lively. Crack a smile, wiggle your toes, and have fun with it.
Advanced Tips and Tricks
To elevate your splash photography game, it’s all about catching the right moment with the right technique.
Whether it’s fruits dancing in the air or paint flung across a room, the vibrancy of colors in midair can create an ecstatic visual spectacle.
Incorporating Multiple Subjects and Splashes
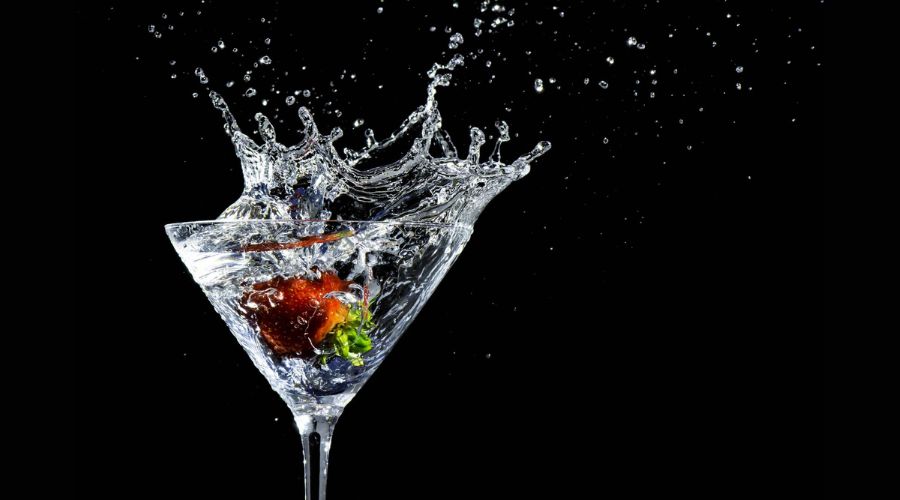
Don’t be shy to toss more than one object into the frame. Imagine several strawberries seemingly floating around, colliding with splashes of milk. It’s like a fruity ballet, and you’re the choreographer.
The trick is to synchronize your shutter release with the peak of the action. A remote trigger can be your best pal here, letting you drop and snap without doing a juggling act.
Experimenting with Different Angles and Perspectives
Turn things on their head, quite literally. A top-down view can transform a boring old table into a stage for gravity-defying acts.
Try a side-shot to catch the droplets in a dramatic arc. Use a ladder or shoot from the ground up.
Switching up your viewpoint can bring an entirely new dimension to your splash-tastic photos. It’s like looking at a familiar face from a new angle, and suddenly they’re movie star material.
Using External Flashes and Reflectors
When you’re painting with light and color, shadows can be your nemesis. They lurk in corners, waiting to dull your masterpiece.
Banish them with a couple of external flashes. Set them up on either side to ensure the light hits all the right notes, like spotlights on a Broadway stage.
Reflectors aren’t just for selfies; they can bounce light back into the scene, making it pop like a firecracker on the Fourth of July.
Ready to Capture Some Floating Colors?
Alright, are you feeling like a hotshot after diving into the splash photography?
You’ve got the tools, the know-how, and a sprinkle of creativity – you’re practically a photo wizard now.
Remember, practice makes perfect, so don’t be afraid to get a little messy and have some fun with it. Make those colors dance in mid-air and your audience will think they’ve hit the jackpot in a visual candy store.
Keep your eyes peeled for that perfect moment when color and gravity defy each other – it’s like catching a firefly in your hands, purely magical.
Mix and match those shutter speeds and apertures like you’re the DJ of your camera. Soon enough, you’ll have photos that’ll make people’s jaws drop faster than an apple in Newton’s backyard.
And hey, if your first few shots don’t make a splash, just remember: Rome wasn’t built in a day, and neither is your masterpiece.
Be bold, be brave, and above all, enjoy the ride. Because when you nail that perfect shot, you won’t just hear the shutter click, you’ll hear the crowd go wild.
Share your levitating masterpieces and watch as the likes and shares take flight – who knows, you might just become the next big thing in the photo world. Now go out there and freeze some colors in the air. Catch you on the flip side!
Frequently Asked Questions
What is Levitating Color Splash Photography?
Levitating color splash photography, huh? Think of it like snapping a shot of a magician’s trick. Your subject—say, a fruit or a ball—looks like it’s hanging in the air. Then, kaboom! You get those awesome color bursts like fireworks in the background. Magic without the wand!
Do I need fancy equipment to capture a levitating color splash?
Nah, you don’t need to break the piggy bank for gear. A good camera, speedlight or flash, and some colorful paints or dyes will do the trick. Just toss the subject up, click at the right moment, and splash! You got yourself one cool picture.
How can I make my subject look like it’s floating?
You’re gonna play a little trick. Toss your subject in the air and snap the picture before it falls. Or, be sneaky and use some thin string to hold it up—just make sure to hide it with the splash. Shh, don’t tell anyone. It’s our little secret!
What’s the best setting for my camera?
Go with a faster shutter speed to freeze the action, like 1/1000th of a second. Keep your ISO low to avoid grainy pics. And you’ll want to stick with a narrow aperture—f/8 should give you that crisp subject and splash. Like catching a firefly with your camera!
Any tips on lighting for these shots?
Okay, you’re gonna be a light wizard. Get that flash off your camera, angle it to the side, and BAM! That’ll make the colors pop like a Fourth of July sparkler. If you can dim the ambient light, even better. It’ll make your splash the star of the show.
What should I use for the color splash effect?
Paints, dyed water, or even colored sand. Fling it right behind your floating subject when you snap the pic. Use colors that shout, like red or blue. It’s like hitting a piñata, and all the goodies are flying out. Fun and messy!
How can I stay safe and prevent a mess?
First off, safety glasses are your friend. Keep those peepers safe from flying colors. Set up in a space that’s cool with a little mess, like your garage. Lay down tarps or plastic sheets. Oh, and wear clothes that can take a hit. It’s gonna be like a mini paint party!
Can I do levitating color splash photography indoors?
Sure, as long as you have space and you don’t mind getting it a bit dirty. Flash that light, use a backdrop that can handle the splash, and let the colors fly. Just think of it as bringing the outdoor fun inside. Like an indoor carnival ride for your camera!
How do I clean up after taking levitating color splash photos?
Alright, clean-up crew time. Get those tarps to the trash or hose them down. Wipe surfaces with water and mild soap. Remember, this art’s a bit like finger painting. It’s part of the experience and totally worth the wow shot you’ll get.

